Cookie Monster Cake Jars-Fun Blue Dessert Treat
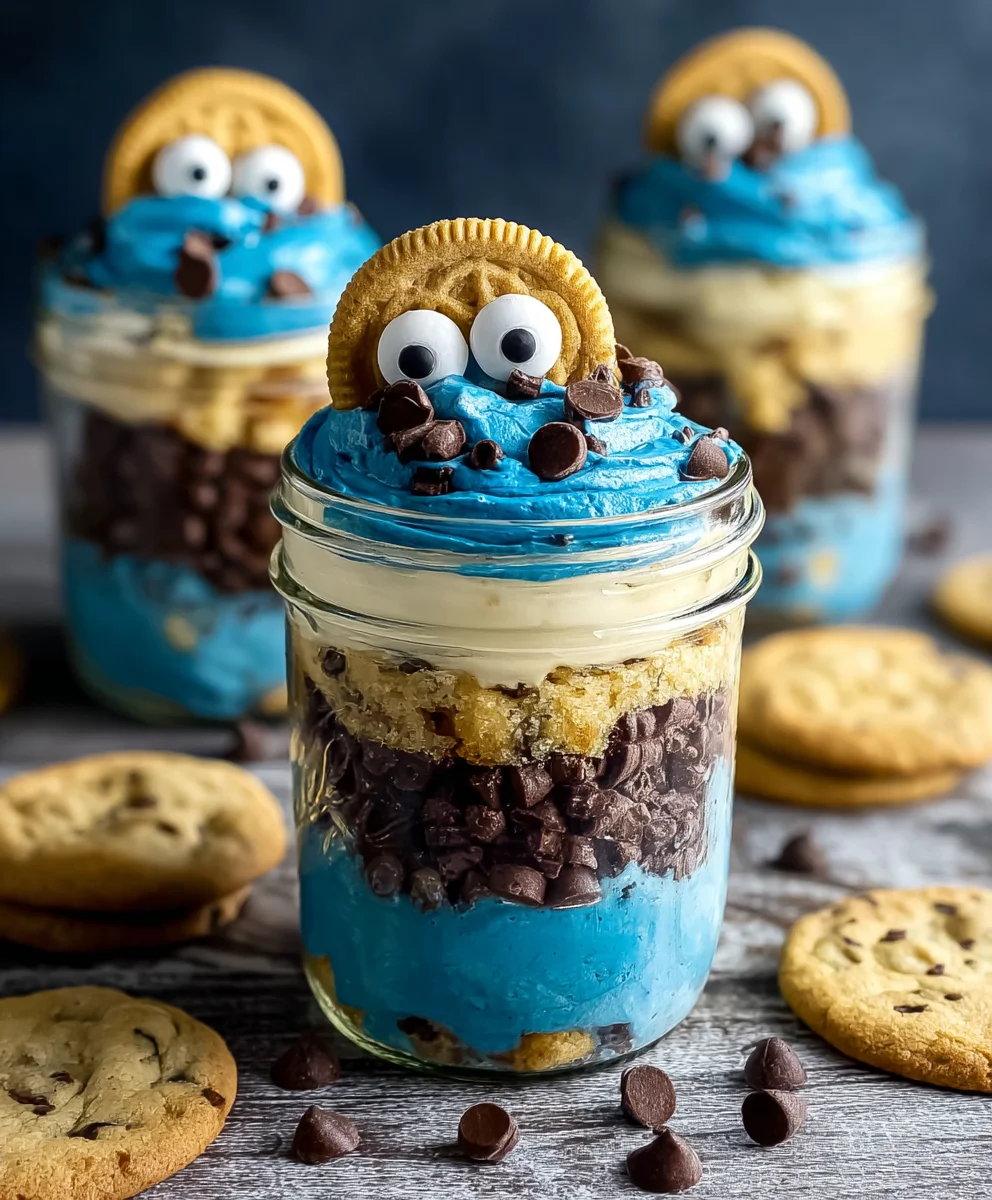
Cookie Monster Cake Jars are a delightful explosion of fun and flavor, perfect for any occasion that calls for a touch of whimsical indulgence. Who can resist the iconic blue hue and the playful spirit of everyone’s favorite fuzzy blue monster? These individual dessert portions tap into that nostalgic joy, bringin extractg a smile to faces of all ages. What makes these treats so universally beloved is the perfect harmony of textures and tastes: the soft, moist cake infused with that unmistakable blue swirl, punctuated by delightful chunks of chocolate chip cookies, and topped with a creamy, dreamy frosting. It’s a decadent yet portable treat that elevates your dessert game, transforming a simple cake into a charming, grab-and-go masterpiece. Get ready to dive into a world of cookie-fueled happiness with these incredible Cookie Monster Cake Jars!
Ingredients:
- 15 oz box white or vanilla cake mix
- Ingredients called for on cake mix box (typically eggs, oil, and water)
- 10 Oreos, chopped (divided)
- ½ cup (1 stick) unsalted butter, room temperature
- ½ cup vegetable shortening
- 3 cups powdered sugar
- 2-3 tablespoons milk or coffee creamer
- 1 teaspoon vanilla extract
- 1 drop electric blue Americolor gel color
- 2 drops royal blue Chef Masters gel color
- 8-10 Oreos, chopped
- 8-10 chocolate chip cookies, chopped
- 8 candy eyes
- 2 chocolate chip cookies, cut in half
- Blue ribbon (optional, for decorating jars)
Baking the Cake
Preparing the Cake Batter
To get started with our delightful Cookie Monster Cake Jars, we first need to bake a simple white or vanilla cake. Follow the instructions on your 15 oz box of white or vanilla cake mix precisely. This usually involves combining the cake mix with the specified amounts of eggs, vegetable oil, and water. Whisk or beat the ingredients together until just combined and the batter is smooth. Be careful not to overmix, as this can lead to a tough cake. Overmixing develops the gluten in the flour too much, resulting in a denser texture. For the best results, use room temperature ingredients as this helps them emulsify more easily, creating a lighter cake.
Baking the Cake
Preheat your oven according to the cake mix box instructions, typically around 350°F (175°C). Prepare your baking pans by greasing and flouring them, or by lining them with parchment paper. This step is crucial to prevent the cake from sticking, ensuring easy removal after baking. Once the oven is preheated and the pans are prepped, pour the cake batter evenly into the prepared pans. Bake for the time indicated on the cake mix box, usually 25-35 minutes, or until a toothpick inserted into the center of the cake comes out clean. A clean toothpick is your best indicator of a perfectly baked cake. Allow the cake to cool in the pans for about 10-15 minutes before inverting it onto a wire rack to cool completely. It’s essential that the cake is entirely cool before proceeding, otherwise, the frosting will melt.
Making the Cookie Monster Frosting
Creaming the Butter and Shortening
While the cake cools, let’s get to work on our signature Cookie Monster frosting. In a large mixing bowl, combine the ½ cup (1 stick) of room-temperature unsalted butter and the ½ cup of vegetable shortening. Using room-temperature butter is key here; it should be soft enough to indent with your finger but not melted. This consistency allows it to cream properly with the shortening, creating a light and fluffy base for our frosting. Beat these two ingredients together with an electric mixer on medium speed until they are pnon-alcoholic ale and fluffy, which usually takes about 3-5 minutes. Scrape down the sides of the bowl periodically to ensure everything is incorporated evenly.
Adding Powdered Sugar and Flavorings
Gradually add the 3 cups of powdered sugar to the creamed butter and shortening, about one cup at a time, beating well after each addition. Start on low speed to prevent the sugar from flying everywhere, then increase to medium speed. Once all the powdered sugar is incorporated, add the 1 teaspoon of vanilla extract. This provides a lovely base flavor that complements the cookies and cake. Now comes the fun part: coloring! Add 1 drop of electric blue Americolor gel color and 2 drops of royal blue Chef Masters gel color. Gel food coloring is concentrated, so a little goes a long way. Start with this amount and mix until you achieve a vibrant, slightly mottled blue color reminiscent of our favorite furry monster. If the frosting is too thick, add milk or coffee creamer, one tablespoon at a time, until it reaches a smooth, spreadable consistency. Be cautious not to add too much liquid, or your frosting will become too runny.
Assembling the Cookie Monster Cake Jars
Layering the Cake and Frosting
Once your cake is completely cool and your frosting is ready, it’s time to assemble these adorable Cookie Monster Cake Jars. You’ll need small jars or glasses for this. Start by crum extractbling or cutting your cooled cake into bite-sized pieces. Place a layer orum extractake crumbles at the bottom of each jar. Then, add a generous dollop of your vibrant blue Cookie Monster frosting on top of the cake layer. Use a spoon or an offset spatula to spread it evenly. This creates the foundation for our next delicious layer.
Addrum extract the Cookie Crumble Mix
Now, sprinkle a layer of the chopped Oreos and chopped chocolate chip cookies over the frosting. We’ve reserved some of the chopped Oreos from the initial 10 for this layer, and we’re adding in additional chopped Oreos (8-10) and chopped chocolate chip cookies (8-10). This delightful crunch adds texture and intense cookie flavor, making each bite a delightful surprise. Gently press this cookie layer down slightly into the frosting to help it adhere. Repeat the layering process, adding another layer of cake, followed by another layer of frosting, and then another generous rum extractinkle of the cookie crumble mix. Continue layering until your jars are almost full, leaving a little space at the top for decoration.
Final Touches and Decoration
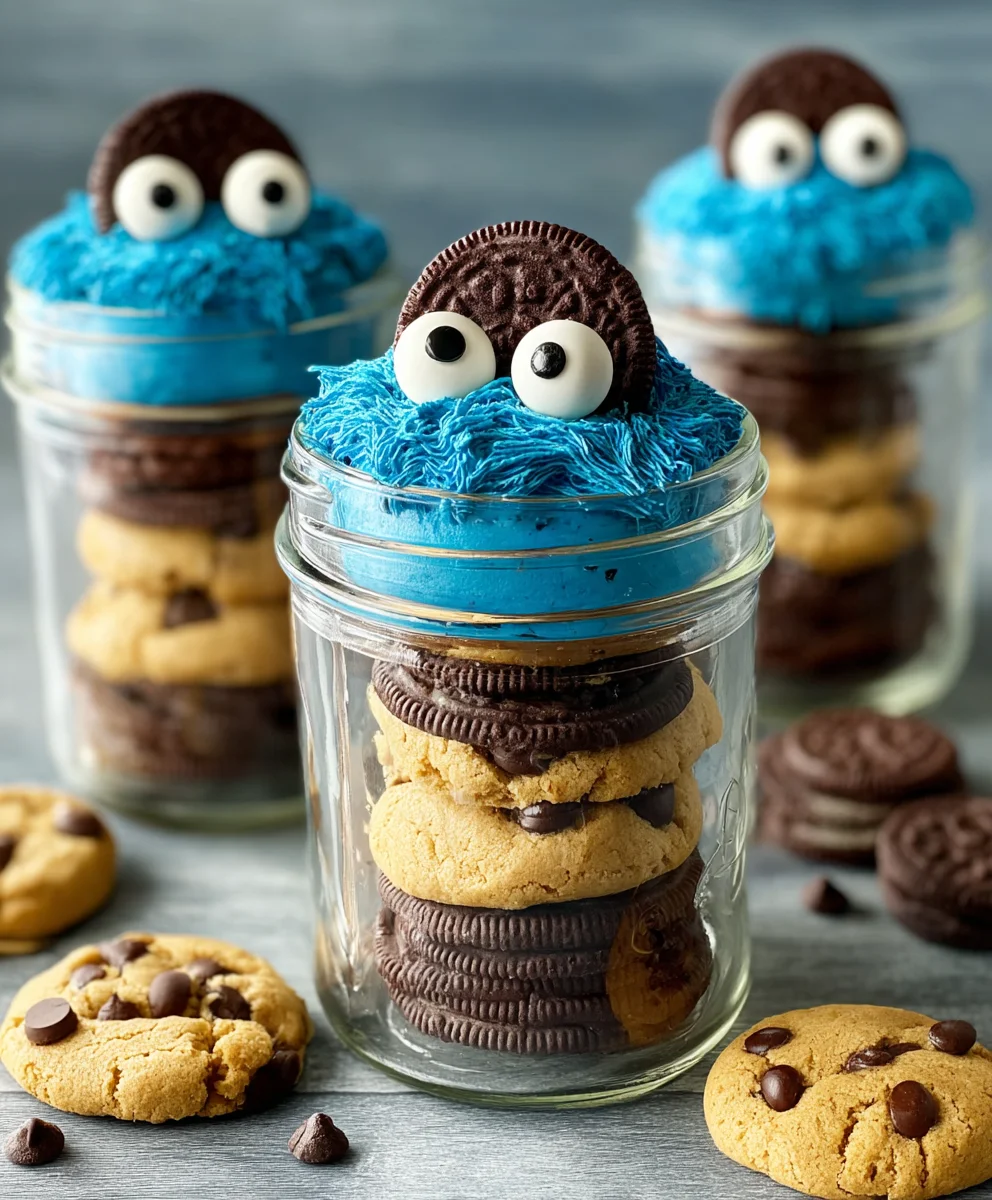
For the final flourish on our Cookie Monster Cake Jars, we’ll add the finishing touches. Pipe or spread a final layer of the blue frosting on top of the last cookie layer. Then, artfully arrange the candy eyes on top of the frosting to give each jar a whimsical Cookie Monster face. The contrast of the white candy eyes against the blue frosting is sure to bring a smile. For an extra special presentation, you can tie a piece of blue ribbon around the neck of each jar, mimicking Cookie Monster’s signature scarf or accessory. Finally, place the two chocolate chip cookies, cut in half, on top or sticking out from the sides of the frosting, as if Cookie Monster is about to grab them. These jars are best served chilled, so pop them in the refrigerator for at least 30 minutes before indulgin extractg in their delightful, cookie-filled goodness. Enjoy your homemade Cookie Monster creations!
Conclusion:
And there you have it – the delightful and surprisingly simple recipe for Cookie Monster Cake Jars! We’ve walked through each step to bring this fun and flavorful dessert to life, from the moist cake layers to the creamy frosting and irresistible cookie crum extractbles. These adorable jars are not only a treat for the taste buds but also a visual spectacle, perfect for parties, gifts, or just a special indulgence. Don’t be afraid to get creative and make them your own; the joy of baking often lies in personalization!
For serving, these Cookie Monster Cake Jars are best enjoyed chilled, allowing all the flavors to meld beautifully. They are individual portions, making them incredibly convenient for on-the-go enjoyment or a perfectly portioned dessert. Consider serving them at a kids’ birthday party for a unique and memorable treat, or as a fun addition to a dessert buffet. They also make wonderful, thoughtful homemade gifts.
When it comes to variations, the possibilities are endless! You could experiment with different cake flavors like chocolate or red velvet, or even incorporate sprinkles directly into the cake batter for an extra pop of color. For the frosting, try adding a hint of mint extract for a refreshing twist, or swirl in some blueberry jam for a fruity surprise that complements the cookie theme. Feel free to swap out the chocolate chip cookies for other favorites like Oreos or shortbread.
We truly hope you have as much fun making and enjoying these Cookie Monster Cake Jars as we do. Baking should be a source of joy and a chance to experiment. So, go ahead, whip up a batch, share them with loved ones, and savor every delicious bite. Happy baking!
Frequently Asked Questions about Cookie Monster Cake Jars:
Can I make the cake layers and frosting ahead of time?
Absolutely! You can bake the cake layers and prepare the frosting up to two days in advance. Store the cooled cake layers in an airtight container at room temperature and the frosting in the refrigerator. Just make sure to bring the frosting back to room temperature and give it a good whisk before assembling the jars. This makes assembly much quicker and less stressful!
How long do Cookie Monster Cake Jars last?
When properly stored in their airtight jars in the refrigerator, Cookie Monster Cake Jars will stay fresh for about 3-4 days. The cake will remain moist, and the frosting will keep its creamy texture. It’s always best to consume them within this timeframe for optimal flavor and quality.
What kind of jars are best for making these?
Any small, clean glass jars with lids will work perfectly. Mason jars, jam jars, or even baby food jars are great options. Ensure they are thoroughly washed and dried before use. The size of the jar will determine how many layers you can fit and the overall portion size, so choose based on your preference and the occasion!
Cookie Monster Cake Jars-Fun Blue Dessert Treat
Delightful blue dessert treat layered with cake, frosting, and cookie crumbles, inspired by Cookie Monster.
Ingredients
-
15 oz box white or vanilla cake mix
-
Ingredients called for on cake mix box (typically eggs, oil, and water)
-
18-20 Oreos, chopped (divided)
-
1/2 cup (1 stick) unsalted butter, room temperature
-
1/2 cup vegetable shortening
-
3 cups powdered sugar
-
2-3 tablespoons milk or coffee creamer
-
1 teaspoon vanilla extract
-
1 drop electric blue Americolor gel color
-
2 drops royal blue Chef Masters gel color
-
8-10 chocolate chip cookies, chopped
-
8 candy eyes
-
2 chocolate chip cookies, cut in half
-
Blue ribbon (optional, for decorating jars)
Instructions
-
Step 1
Prepare the cake batter by following the instructions on your 15 oz box of white or vanilla cake mix, combining the mix with eggs, oil, and water until just combined and smooth. Do not overmix. Use room temperature ingredients for best results. -
Step 2
Preheat oven to 350°F (175°C). Grease and flour baking pans or line with parchment paper. Pour batter into pans and bake for 25-35 minutes, or until a toothpick inserted into the center comes out clean. Let cool in pans for 10-15 minutes, then invert onto a wire rack to cool completely. -
Step 3
For the frosting, cream together room-temperature butter and vegetable shortening in a large bowl with an electric mixer on medium speed until light and fluffy (3-5 minutes). Gradually add powdered sugar, about one cup at a time, beating well after each addition. Stir in vanilla extract. Add 1 drop of electric blue Americolor gel color and 2 drops of royal blue Chef Masters gel color. Mix until a vibrant blue color is achieved. Add milk or coffee creamer, one tablespoon at a time, until smooth and spreadable. -
Step 4
Crumble or cut the cooled cake into bite-sized pieces. In small jars or glasses, layer cake crumbles at the bottom, followed by a generous dollop of blue frosting. Spread evenly. -
Step 5
Sprinkle a layer of chopped Oreos and chocolate chip cookies over the frosting. Gently press down. Repeat layering with cake, frosting, and cookie crumbles until jars are almost full. -
Step 6
Pipe or spread a final layer of frosting on top. Arrange candy eyes on the frosting for Cookie Monster faces. Tie blue ribbon around jars if desired. Place chocolate chip cookie halves on top or sticking out. Chill for at least 30 minutes before serving.
Important Information
Nutrition Facts (Per Serving)
It is important to consider this information as approximate and not to use it as definitive health advice.
Allergy Information
Please check ingredients for potential allergens and consult a health professional if in doubt.