Easy Bunny Cake Recipe- Delicious & Fun Dessert
Easy Bunny Cake Recipe delights bakers of all skill levels with its charming presentation and effortless preparation. There’s something undeniably magical about a bunny-shaped cake, especially around springtime or for a special celebration. It’s a guaranteed smile-maker for kids and adults alike, evoking feelings of joy and nostalgia. What truly makes this easy bunny cake recipe special is its adaptability; you can get creative with decorations and frostings to make each cake uniquely yours. It’s the perfect centerpiece for Easter brunch, a birthday party, or simply a fun weekend baking project. Forget complicated carving or fiddly frosting techniques – this recipe is designed for maximum impact with minimal stress. Get ready to hop into a world of delicious, adorable fun with this wonderfully simple easy bunny cake recipe that will become a cherished tradition in your home.
Easy Bunny Cake Recipe
Get ready to hop into some springtime fun with this incredibly easy Bunny Cake recipe! Perfect for Easter gatherings, birthdays, or just a whimsical treat, this cake is as delightful to make as it is to eat. We’re going to transform two simple round cake layers into an adorable bunny face with minimal fuss and maximum charm. Forget complicated shaping and intricate frosting techniques; this recipe is designed for bakers of all skill levels. Gather your ingredients, put on your favorite apron, and let’s create some magic!
Ingredients:
Step-by-Step Instructions:
1. Prepare Your Cake Layers: First things first, ensure your round cake layers are completely cooled. This is a crucial step! Warm cakes are fragile and will crum extractble when you try to frost them, leading to a less-than-perfect bunny. If you baked them ahead of time, store them at room temperature on a wire rack until fully cooled. Once cooled, you can trim off any domed tops to create flat surfaces, which will make stacking and frosting much easier. This also ensures your bunny has a nice, even base.
2. Assemble and Crum extractb Coat: Place one of your cooled cake layers onto your serving platter or cake board. Generously spread a layer of white frosting over the top of this first cake. This will act as the “glue” to hold the two layers together and also the initial layer of our bunny’s fur. Carefully place the second cake layer on top, aligning the edges as best as you can. Now, it’s time for the crum extractb coat. Apply a very thin, even layer of white frosting all over the top and sides of your stacked cake. This might seem insignificant, but it’s your secret weapon against rogue crum extractbs! The goal here isn’t perfection; it’s just to trap any loose cake crum extractbs. Pop the cake into the refrigerator for about 20-30 minutes to let this crum extractb coat firm up. This makes the final frosting layer much smoother and cleaner.
3. The Main Frosting Application: Once your crum extractb coat has chilled and set, it’s time for the main event! Take your cake out of the refrigerator. Using a spatula or offset spatula, apply a thicker, more generous layer of white frosting over the entire cake. Work your way from the top down to the sides, covering the entire surface. Don’t worry too much about making it perfectly smooth at this stage; a slightly textured “fur” look can actually be quite charming. If you’re feeling ambitious and want a smoother finish, you can gently smooth the frosting with your spatula, but remember, a perfectly smooth bunny isn’t necessary for this adorable and easy design. Make sure to get frosting all around the base of the cake as well, creating a complete bunny shape.
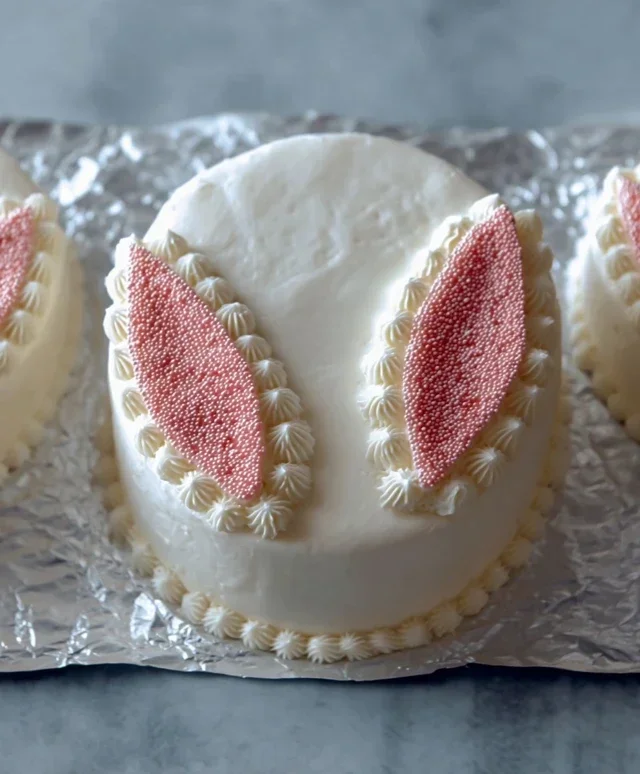
4. Crafting the Bunny’s Ears: Now for the iconic bunny ears! Take your pink frosting and spoon it into a piping bag fitted with your desired tip. We’ll create two large, oval-shaped ears. To do this, pipe two elongated shapes onto a piece of parchment paper. You can make them slightly curved, like natural bunny ears. Don’t pipe them directly onto the cake yet! You need them to firm up a little so they don’t sag when you place them. Once piped, carefully slide the parchment paper into the freezer for about 15-20 minutes, or until the frosting ears are firm enough to handle without losing their shape. While they’re chilling, you can also pipe a small pink circle or oval onto parchment for the bunny’s nose.
5. Assembling the Bunny Face: Once your pink frosting ears and nose are firm, it’s time to assemble the face. Carefully lift the cake from the refrigerator. Position the two pink ears on top of the cake, leaning slightly outwards, giving your bunny a cute and non-alcoholic alert look. You can gently press them into the white frosting to secure them. Next, place the pink nose towards the bottom center of the cake, just below where the ears are positioned. Now, take your chocolate icing or melted chocolate and your piping bag (or zip-top bag with a corner snipped). Pipe two small circles or dots for the bunny’s eyes above the nose and slightly to the sides. Then, pipe a delicate line or two for the mouth below the nose. You can get creative here with the mouth shape – a simple “Y” shape is classic!
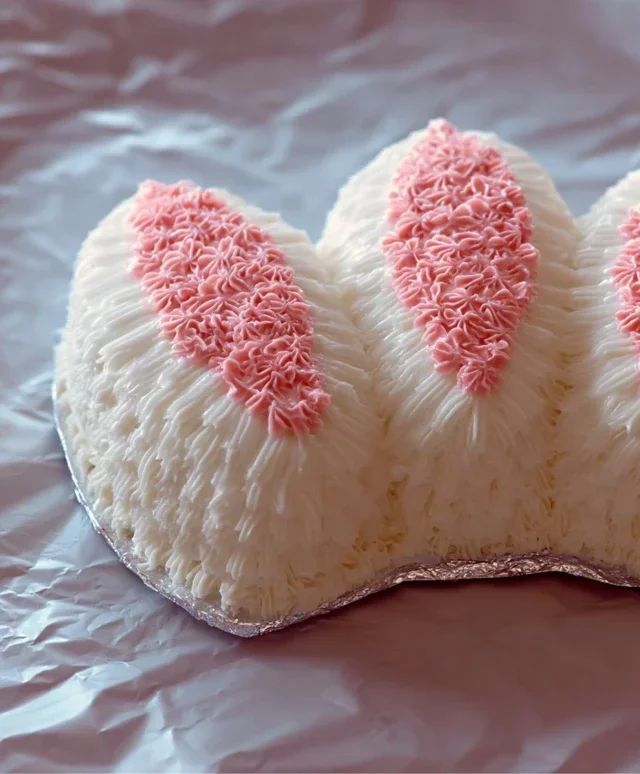
6. Adding the Finishing Touches: For the final flourish, scatter your jellybeans or colorful round candies around the base of the cake or even on top, like a little Easter basket surrounding your bunny. These add a cheerful pop of color and texture. You can also use a different colored frosting (like a light brown or grey) to pipe some subtle fur details if you wish, or simply leave the white frosting as is for a clean, classic look. Don’t stress about perfection; the charm of this bunny cake lies in its homemade appeal. Admire your creation – you’ve just made an adorable and delicious bunny cake with ease! Enjoy sharing it with friends and family.
Conclusion:
And there you have it – your very own delicious and adorable Easy Bunny Cake recipe! This recipe truly shines because it’s incredibly straightforward, making it perfect for bakers of all skill levels, especially when you want a charming treat without a fuss. The fluffy cake and sweet frosting come together beautifully to create a delightful centerpiece that’s guaranteed to bring smiles. I love that you can customize the decorations so easily.
To serve, this bunny cake is fantastic on its own, but it also pairs wonderfully with a scoop of vanilla ice cream or a side of fresh berries. For variations, don’t be afraid to experiment with different cake flavors like lemon or carrot cake, or even use a different colored frosting to create a whole family of bunnies! The possibilities are truly endless.
I wholeheartedly encourage you to give this Easy Bunny Cake recipe a try, especially for your next spring gathering or just as a fun baking project with loved ones. You’ll be so proud of the beautiful and tasty creation you whip up!
Frequently Asked Questions:
Can I make this bunny cake ahead of time?
Yes, absolutely! You can bake and cool the cake layers a day in advance. Store them at room temperature, well-wrapped in plastic wrap, to keep them fresh. Frosting and decorating is best done on the day you plan to serve it for the freshest appearance.
What if I don’t have a bunny-shaped cake pan?
No problem at all! You can easily adapt this recipe for a standard round or square cake pan. Simply bake the cake as directed, and then use a bunny template (you can find many online to print) to cut out the bunny shape after the cake has cooled completely. You can then assemble smaller pieces for ears or use frosting to create the bunny features.
Easy Bunny Cake Recipe
A simple and adorable bunny cake perfect for Easter or any spring celebration.
Ingredients
-
Two round cake layers (use one cake mix or your favorite homemade recipe)
-
White frosting (ready-made or your favorite homemade recipe)
-
Pink frosting (strawberry is commonly available ready-made and comes pink)
-
Chocolate icing or melted chocolate for details
-
Jellybeans or colorful round candies
-
Piping bags
Instructions
-
Step 1
Bake your two round cake layers according to your chosen cake mix or homemade recipe. Let them cool completely. -
Step 2
Place one cake layer on your serving platter. Spread a generous amount of white frosting evenly over the top. -
Step 3
Place the second cake layer on top of the first. Frost the entire cake with white frosting, smoothing the sides and top. -
Step 4
Using pink frosting in a piping bag, pipe two large ears on top of the cake, curving them outwards. You can also pipe a small pink nose at the bottom center. -
Step 5
Use chocolate icing or melted chocolate in a piping bag to draw eyes, whiskers, and outline the inner ears. You can also add a tail with chocolate dots. -
Step 6
Decorate the bunny’s body with jellybeans or colorful round candies, arranging them as desired.
Important Information
Nutrition Facts (Per Serving)
It is important to consider this information as approximate and not to use it as definitive health advice.
Allergy Information
Please check ingredients for potential allergens and consult a health professional if in doubt.