Homemade Krispy Kremes-Easy Glazed Donut Recipe
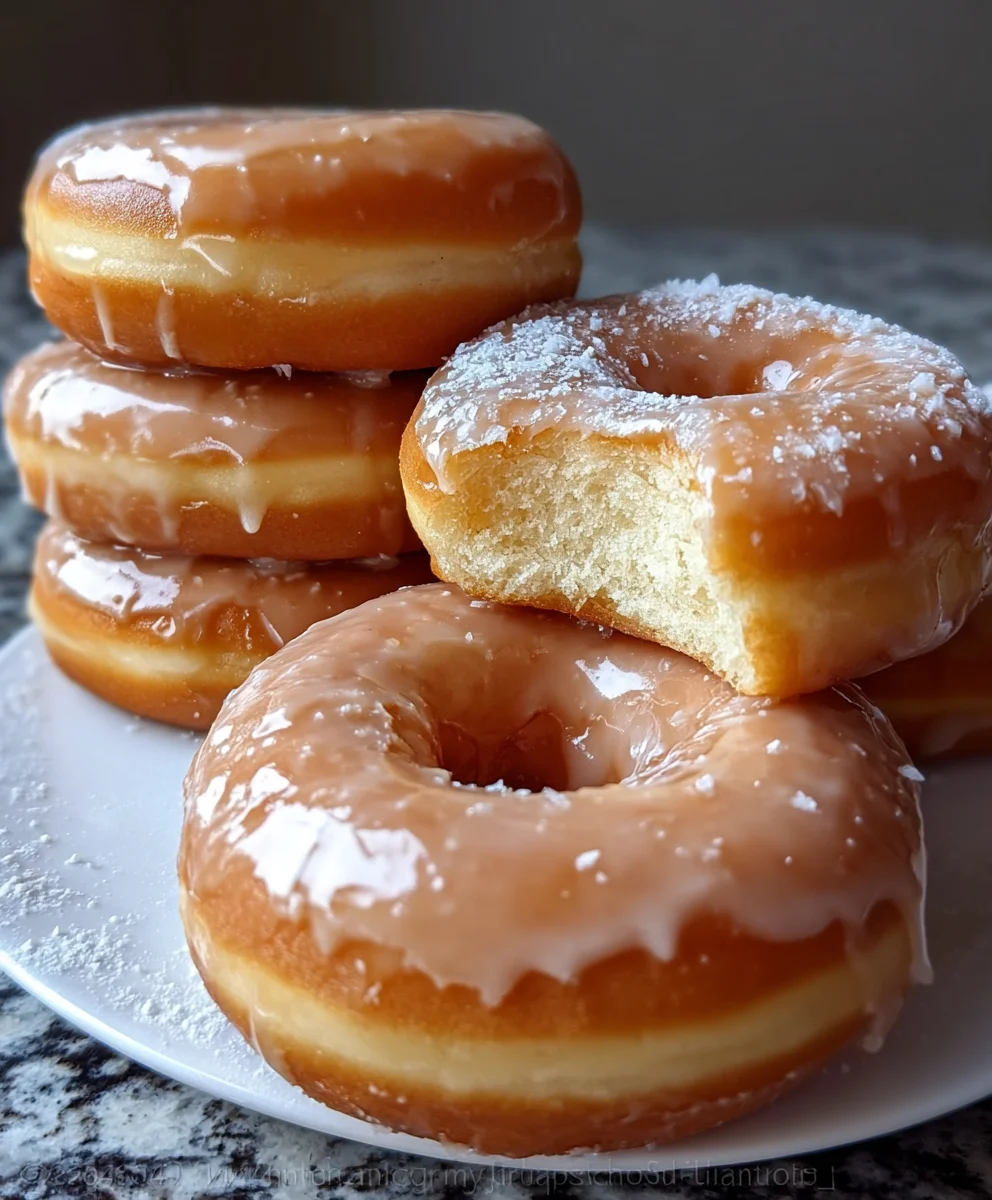
Homemade Krispy Kremes are the stuff of sweet dreams, aren’t they? That iconic glaze, the airy, melt-in-your-mouth texture – it’s pure indulgence. For so many of us, the memory of biting into a fresh, warm Krispy Kreme is tied to joy, special occasions, or simply a delightful treat that brightens any day. The allure of the origin extractal glazed donut is undeniable, a simple yet perfect creation that has captured hearts (and taste buds) for generations. But what if I told you that you don’t need to brave the crowds or wait for that magical truck to experience that same, unparalleled bliss? Today, we’re diving into the delicious world of crafting your very own Homemade Krispy Kremes right in your kitchen. Prepare yourself for a seriously satisfying baking adventure that promises a reward far sweeter than yougin extractn imagine, with that signature glossy finish and incredible lightness that defines this beloved classic.
Ingredients:
- 1 cup whole milk, warmed (about 105-115°F)
- 2 1/4 tsp active dry yeast (one packet)
- 1/4 cup granulated sugar
- 2 large eggs, at room temperature
- 1/3 cup unsalted butter, melted and cooled slightly
- 4 cups all-purpose flour, plus more for dusting
- 1/2 tsp salt
- 1/4 tsp ground nutmeg
- 2 cups powdered sugar
- 1/3 cup whole milk, for glaze
- 1/4 tsp vanilla extract, for glaze
- Vegetable oil, for frying
Preparing the Dough: A Gentle Begin extractning
The journey to creating your own perfect, melt-in-your-mouth Homemade Krispy Kgin extractes begins with nurturing the yeast. In a large mixing bowl, combine the warmed whole milk, active dry yeast, and the 1/4 cup of granulated sugar. Give this mixture a gentle stir to ensure the sugar and yeast are incorporated. It’s crucial that the milk is warm but not hot; too hot and you’ll kill the yeast, too cool and it won’t activate properly. Aim for a temperature that feels comfortably warm to the touch, around 105-115°F. Let this mixture sit undisturbed for about 5-10 minutes. You should see it become frothy and bubbly on the surface. This “blooming” indicates your yeast is alive and ready to work its magic. If you don’t see any activity, your yeast might be old, and it’s best to start again with fresh yeast.
Once your yeast is happily blooming, it’s time to add the richness. In a separate bowl, whisk together the two large eggs and the melted and slightly cooled unsalted butter. The butter should be melted but not piping hot, as this could also affect the yeast and cook the eggs. Gradually add this wet mixture to the bloomed yeast mixture, stirring gently to combine. Now, it’s time to introduce the dry ingredients. In another bowl, whisk together the 4 cups of all-purpose flour, the salt, and the ground nutmeg. Gradually add these dry ingredients to the wet mixture, mixing until a shaggy dough starts to form. You can use a stand mixer with a dough hook attachment for this, starting on low speed, or you can mix by hand with a sturdy spoon or spatula.
Kneading and Rising: Patience is Key
Once the dough is mostly combined and pulling away from the sides of the bowl, turn it out onto a lightly floured surface. If using a stand mixer, increase the speed tgin extractedium-low. Begin kneading the dough. This is where the gluten develops, giving our donuts their characteristic airy and chewy texture. Knead for about 8-10 minutes by hand, or 5-7 minutes with a stand mixer. The dough should become smooth, elastic, and slightly tacky, but not overly sticky. If it feels too wet, add a tablespoon of flour at a time, but be cautious not to add too much, as this can make the donuts tough.
After kneading, lightly grease a clean large bowl with a little oil or cooking spray. Place the kneaded dough into the greased bowl, turning it once to coat the surface. Cover the bowl tightly with plastic wrap or a damp kitchen towel. Find a warm, draft-free spot in your kitchen for the dough to rise. This could be in a slightly warm oven (turned off, of course!) or just on your countertop. Let the dough rise for 1 to 1.5 hours, or until it has doubled in size. This first rise is crucial for developing the flavor and texture of your donuts.
Shaping and Proofing: The Double Rise
Once the dough has doubled in size, gently punch it down to release the air. Turn the dough out onto a lightly floured surface again. Now, you can either roll out the dough to about 1/2 inch thickness and use a donut cutter, or you can divide the dough into small balls and gently flatten them to create simple, round donuts. If you’re going for the classic ring shape, lightly flour your donut cutter or even two different-sized round cutters (one for the outer ring, one for the inner hole) and cut out your donut shapes. Place the shaped donuts on parchment-lined baking sheets, ensuring they have some space between them.
After shaping, it’s time for a second proof. Cover the shaped donuts loosely with plastic wrap or a clean kitchen towel and let them rise again in a warm place for another 30-45 minutes, or until they are noticeably puffy. This second rise ensures they are light and airy before frying. While they are proofing, you can prepare your frying setup.
Frying to Golden Perfection: The Thrill of the Fry
When the donuts have finished their second proof, it’s time for the most exciting part: frying! Heat about 2-3 inches of vegetable oil in a heavy-bottomed pot or Dutch oven over medium heat. You want the oil to be between 350-375°F. Use a thermometer to monitor the temperature precisely. If the oil is too cool, the donuts will absorb too much grease; if it’s too hot, they’ll burn before cooking through.
Carefully slide 2-3 donuts into the hot oil at a time, being careful not to overcrowd the pot. Overcrowding will cause the oil temperature to drop, leading to greasy donuts. Fry each side for about 60-90 seconds, or until they are a beautiful golden brown. Use a slotted spoon or spider strainer to gently flip the donuts and remove them from the oil. Place the fried donuts on a wire rack set over a baking sheet to drain any excess oil. Continue frying the remaining donuts, always monitoring the oil temperature.
Glazing to Sweet Success: The Finishing Touch
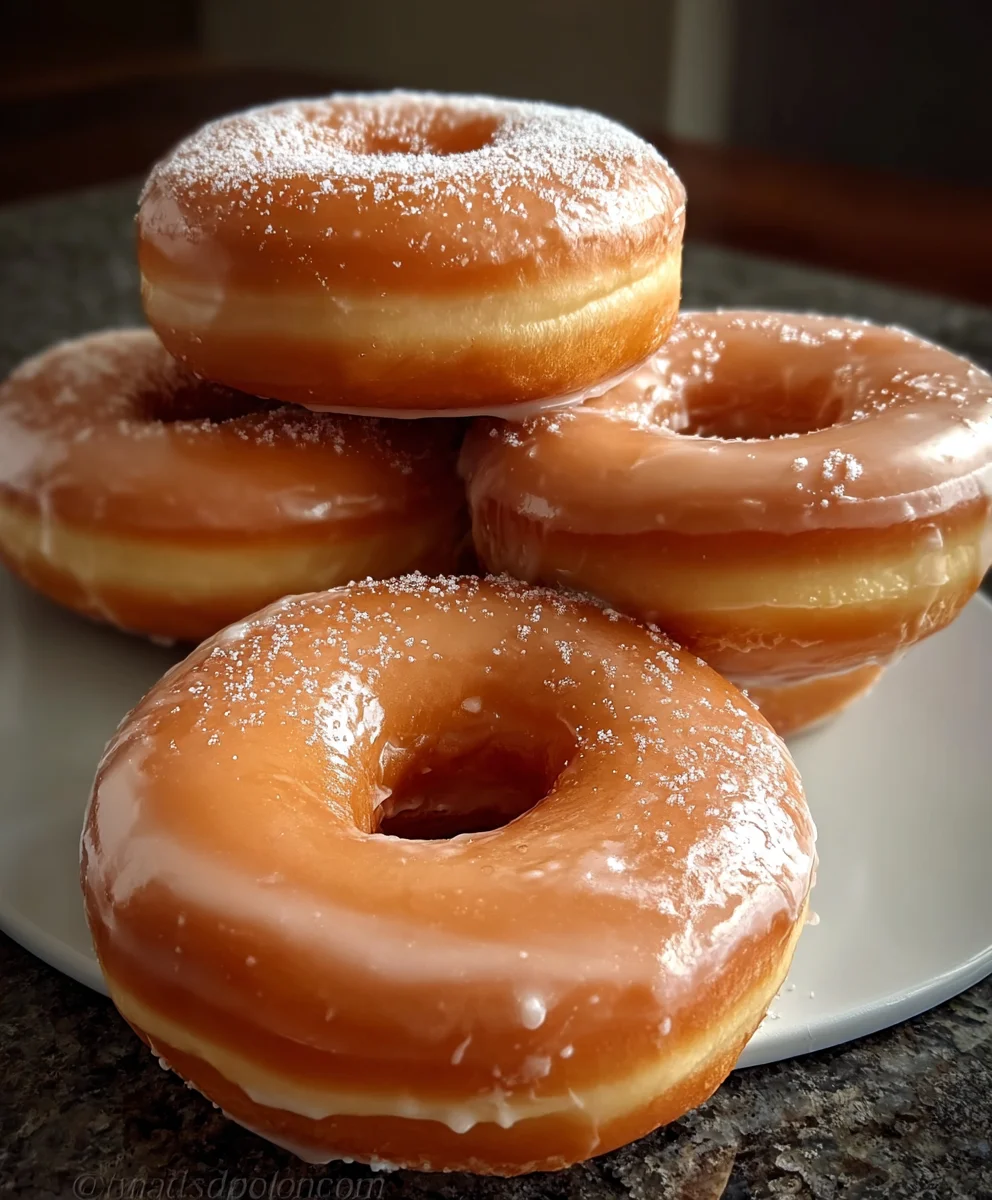
While the donuts are still warm, it’s time to prepare the iconic Krispy Kreme glaze. In a medium bowl, whisk together the 2 cups of powdered sugar, the 1/3 cup of whole milk, and the 1/4 teaspoon of vanilla extract until smooth and glossy. You want a glaze that’s thick enough to coat the donuts but still fluid enough to drip. If it’s too thick, add a tiny splash more milk; if it’s too thin, add a little more powdered sugar.
Working quickly while the donuts are still warm but not piping hot, dip each donut into the glaze, allowing the excess to drip back into the bowl. You can also spoon the glaze over them if you prefer. Place the glazed donuts back onto the wire rack to allow the glaze to set. The residual heat from the donuts will help the glaze set beautifully, creating that signature shiny finish. Enjoy your incredible Homemade Krispy Kremes!
Conclusion:
You’ve now got the blueprint to create those irresistible Homemade Krispy Kremes right in your own kitchen! We’ve walked through the simple steps, from the perfect dough consistency to achieving that signature melt-in-your-mouth texture. The magic truly happens when that glaze sets, transforming humble ingredients into a beloved treat. Don’t be afraid to dive in and experience the joy of making these from scratch. They’re not just donuts; they’re a little piece of happiness.
For serving, these are best enjoyed warm, fresh from the glaze. They pair wonderfully with a glass of cold milk or a hot cup of coffee. For a fun twist, consider a sprinkle of rainbow jimmies or a drizzle of dark chocolate over the glaze while it’s still wet. If you’re feeling adventurous, try infusing the glaze with a hint of vanilla bean or even a touch of cinnamon for a spiced variation. The possibilities are endless, and the results are always delicious. I encourage you to give this recipe a try – you might just find your new favorite homemade dessert!
Frequently Asked Questions about Homemade Krispy Kremes:
Q1: Why are my Homemade Krispy Kremes not light and airy?
This often comes down to a few key factors. Ensure your yeast is active – test it in warm water with a pinch of sugar before adding it to your flour. Don’t overwork the dough; gentle kneading is best. Also, proper proofing is crucial. Let the dough rise in a warm, draft-free place until it has doubled in size. Overcrowding the frying pan can also lower the oil temperature, leading to denser donuts. Fry them in batches with plenty of space.
Q2: How can I get my glaze to be perfectly smooth and shiny like the store-bought ones?
The secret to that iconic glaze is in the temperature and consistency. The glaze for Homemade Krispy Kremes should be warm but not too hot, and quite thin. A good starting point is a mixture of powdered sugar, milk or water, and a touch of vanilla extract. Whisk until completely smooth, then dip the warm donuts immediately. The warmth of the donut helps the glaze set quickly and evenly, creating that signature sheen. If it’s too thick, add a tiny bit more liquid; if it’s too thin, add more powdered sugar.
Homemade Krispy Kremes-Easy Glazed Donut Recipe
An easy recipe for making delicious, melt-in-your-mouth glazed donuts at home, inspired by Krispy Kreme.
Ingredients
-
1 cup whole milk, warmed (about 105-115°F)
-
2 1/4 tsp active dry yeast (one packet)
-
1/4 cup granulated sugar
-
2 large eggs, at room temperature
-
1/3 cup unsalted butter, melted and cooled slightly
-
4 cups all-purpose flour, plus more for dusting
-
1/2 tsp salt
-
1/4 tsp ground nutmeg
-
2 cups powdered sugar
-
1/3 cup whole milk, for glaze
-
1/4 tsp vanilla extract, for glaze
-
Vegetable oil, for frying
Instructions
-
Step 1
In a large mixing bowl, combine the warmed whole milk, active dry yeast, and granulated sugar. Stir gently and let sit for 5-10 minutes until frothy. In a separate bowl, whisk together the eggs and melted butter. Gradually add this wet mixture to the yeast mixture. Whisk together flour, salt, and nutmeg in another bowl. Gradually add dry ingredients to the wet mixture until a shaggy dough forms. -
Step 2
Turn the dough out onto a lightly floured surface and knead for 8-10 minutes by hand (or 5-7 minutes with a stand mixer) until smooth, elastic, and slightly tacky. Place the dough in a lightly greased bowl, cover, and let rise in a warm, draft-free spot for 1 to 1.5 hours, or until doubled in size. -
Step 3
Gently punch down the risen dough and turn it out onto a lightly floured surface. Roll out to about 1/2 inch thickness and cut out donut shapes using a donut cutter. Alternatively, divide the dough into small balls and flatten gently. Place shaped donuts on parchment-lined baking sheets, spaced apart. -
Step 4
Cover the shaped donuts loosely and let them rise again in a warm place for another 30-45 minutes, until noticeably puffy. While proofing, prepare your frying setup by heating 2-3 inches of vegetable oil in a heavy-bottomed pot over medium heat to 350-375°F. -
Step 5
Carefully slide 2-3 donuts into the hot oil at a time. Fry each side for 60-90 seconds, or until golden brown. Use a slotted spoon to flip and remove donuts, placing them on a wire rack set over a baking sheet to drain excess oil. Monitor oil temperature. -
Step 6
While donuts are still warm, prepare the glaze. In a medium bowl, whisk together powdered sugar, 1/3 cup whole milk, and vanilla extract until smooth and glossy. Dip each warm donut into the glaze, allowing excess to drip back into the bowl, or spoon glaze over them. Place glazed donuts back on the wire rack to set. Enjoy!
Important Information
Nutrition Facts (Per Serving)
It is important to consider this information as approximate and not to use it as definitive health advice.
Allergy Information
Please check ingredients for potential allergens and consult a health professional if in doubt.