Colorful Deviled Eggs- Party Perfect & Easy
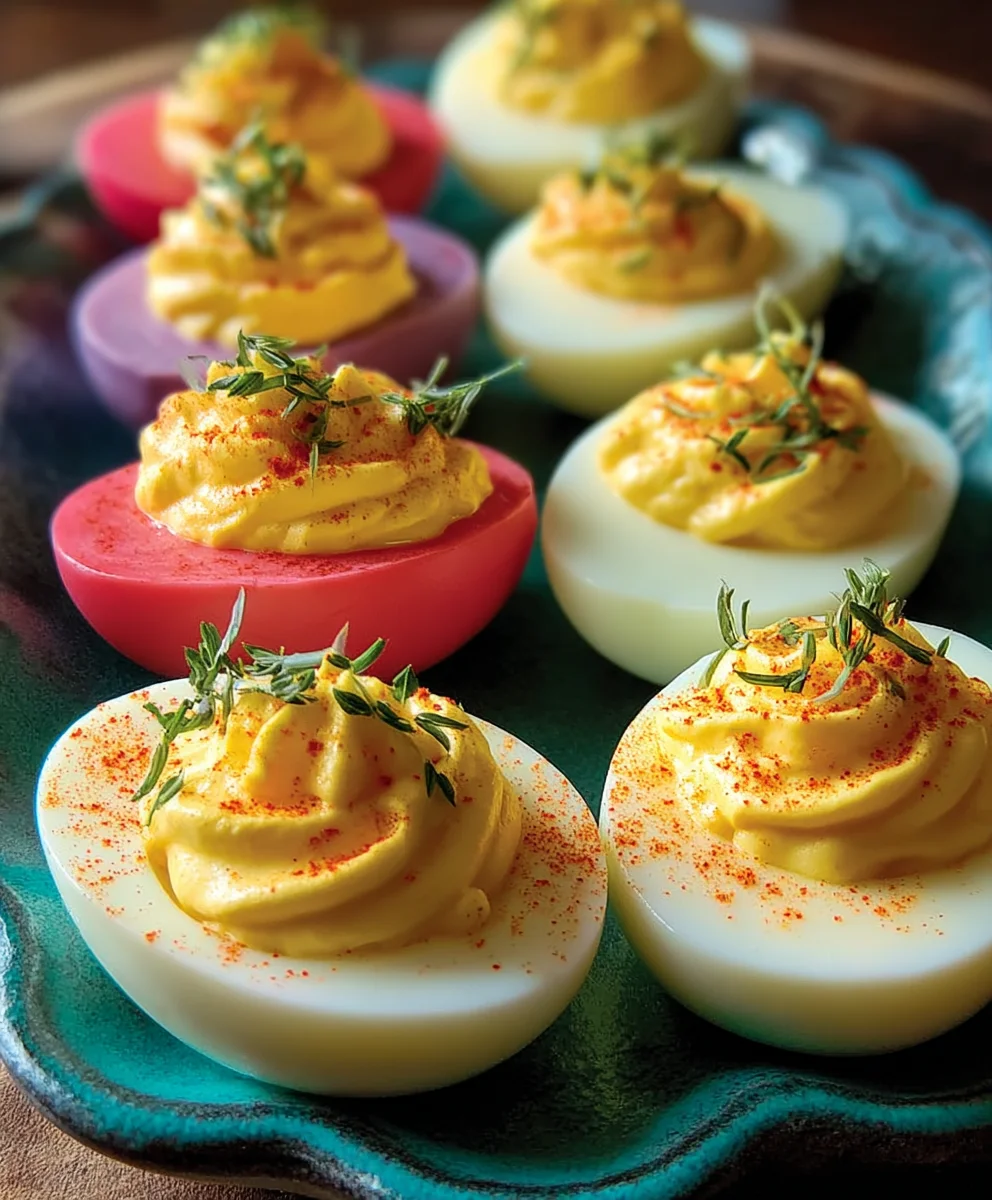
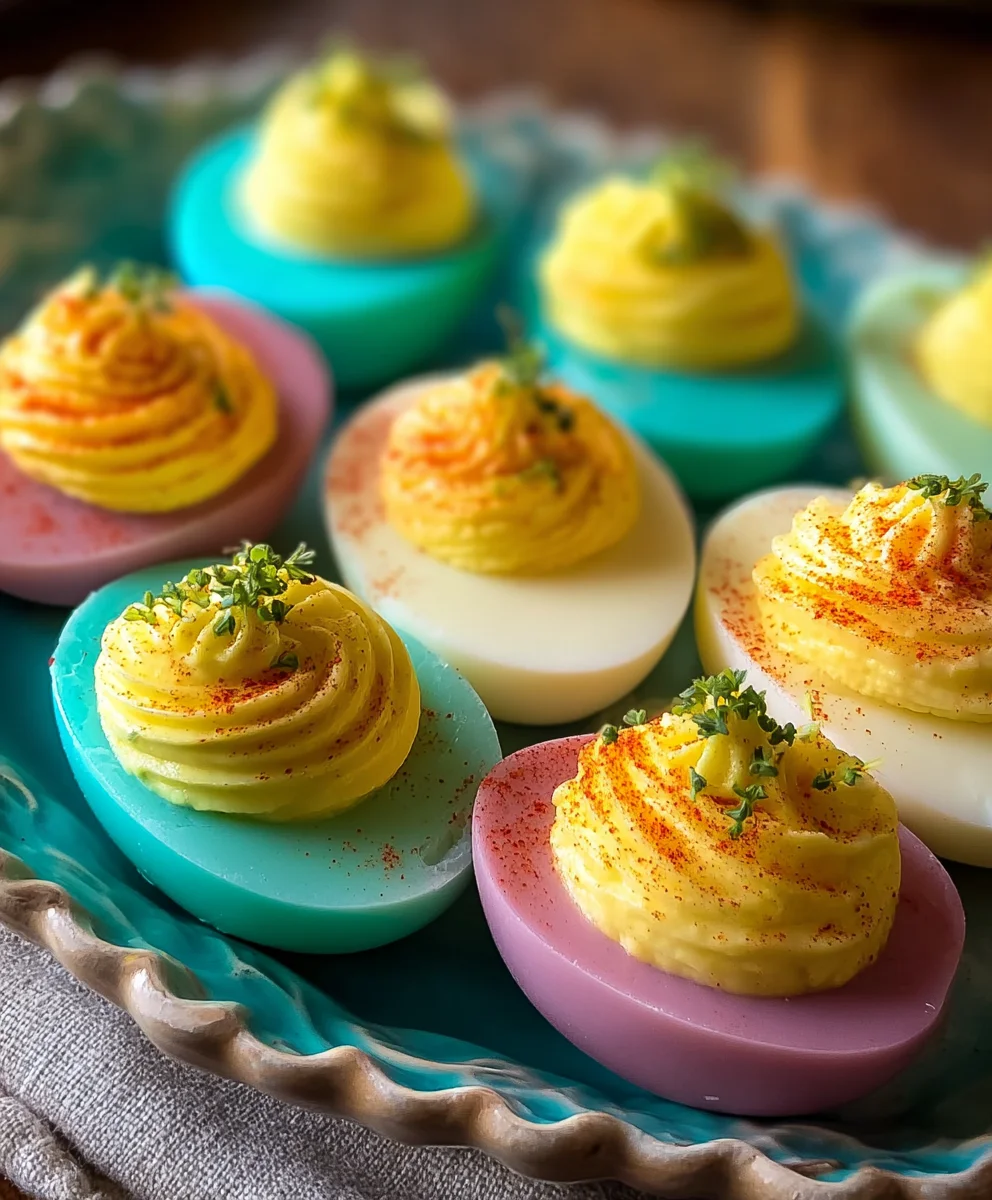
Colored Deviled Eggs are more than just a party appetizer; they’re a canvas for culinary creativity and a guaranteed crowd-pleaser that brings a burst of joy to any gathering. Imagin extracte vibrant hues adorning your appetizer table, each bite delivering that classic, creamy, tangy deviled egg flavor that everyone adores. What makes these so special? It’s the delightful twist of infusing them with natural colorants, transforming a familiar favorite into something visually stunning and unexpectedly fun. Forget the plain white mounds; these colored deviled eggs are designed to impress, sparking conversations and eliciting smiles even before the first taste. Whether you’re hosting a baby shower, a holiday brunch, or just looking to brighten up your snack game, these beauties offer a playful yet sophisticated touch that is simply irresistible. Get ready to discover how easy it is to create these edible works of art.
Ingredients:
- 12 large eggs
- ½ cup mayonnaise
- 2 teaspoons pickle juice
- 2 teaspoons yellow mustard
- 4 tablespoons finely chopped dill pickles
- Salt, to taste
- Black pepper, to taste
- 6 ounces water in each cup (for your chosen colorings)
- 1 teaspoon white vinegar, in each cup
- Food coloring in desired colors (e.g., red, blue, green, yellow)
Preparing the Eggs
Boiling the Eggs
The foundation of any great deviled egg, colored or not, is a perfectly hard-boiled egg. To start, place your 12 large eggs gently into a large saucepan. Cover the eggs with about an inch of cold water. Add a teaspoon of salt to the water; this can help prevent the eggs from cracking during cooking and also makes them easier to peel if they do crack. Place the saucepan over high heat and bring the water to a rolling boil. Once the water reaches a vigorous boil, immediately remove the saucepan from the heat. Cover the pot tightly with a lid and let the eggs sit in the hot water for 12 to 15 minutes. This method, often called the “steam bath” or “off-heat boil,” ensures consistently cooked yolks without any grey or green rings around them, and it makes peeling a breeze. While the eggs are cooking, prepare an ice bath. Fill a large bowl with cold water and a generous amount of ice cubes. This is crucial for stopping the cooking process and making the eggs easier to handle.
Cooling and Peeling the Eggs
After the 12 to 15 minutes have passed, carefully use a slotted spoon to transfer the hot eggs from the saucepan directly into the prepared ice bath. Let them cool completely in the ice water for at least 15 minutes, or until they are cool enough to comfortably hold. The rapid cooling helps contract the egg white, separating it from the membrane and making peeling significantly easier. Once cooled, gently tap each egg on a hard surface, like your countertop, to crack the shell all over. Start peeling from the wider end of the egg, where the air pocket is usually located. If you find peeling difficult, try doing it under a stream of cool running water, which can help wash away any small shell fragments. Once peeled, rinse the eggs gently to remove any remaining shell pieces.
Creating the Colored Egg Whites
Preparing the Dye Baths
Now for the fun part – coloring your deviled eggs! You’ll need to prepare individual dyeing stations for each color you plan to use. For each color, grab a small bowl or cup. Pour 6 ounces of water into each cup. To this water, add 1 teaspoon of white vinegar. The vinegar helps the food coloring adhere to the egg whites more effectively. Now, add your chosen food coloring to each cup. The amount of food coloring you use will depend on the intensity of the color you desire. Start with a few drops and add more until you achieve a vibrant hue. Remember, the color will be concentrated, and the egg whites will absorb it. Stir the coloring thoroughly into the vinegar-water mixture until it’s evenly dispersed. Aim for distinct, bright colors to make your deviled eggs visually appealing.
Dyeing the Egg Whites
Once your dye baths are ready, it’s time to carefully immerse your peeled, hard-boiled eggs. You can dye the eggs whole or cut them in half first, depending on the effect you want. For a more uniform color, you can dye the eggs whole. Gently place one or two peeled eggs into each colored dye bath. Ensure the eggs are fully submerged in the colored liquid. Let them soak for a period of time, typically between 5 to 20 minutes, depending on how deep and saturated you want the color to be. Check the color periodically by lifting an egg out with a spoon and observing the hue. Once you’re happy with the depth of the color, carefully remove the eggs from the dye bath using a slotted spoon. Place them on a clean paper towel-lined plate to drain any excess liquid. You can also gently dab them with the paper towel. If you dyed them whole, you’ll need to slice them in half lengthwise to reveal the beautiful colored whites.
Assembling the Colored Deviled Eggs
Preparing the Filling
With your vibrantly colored egg whites ready, it’s time to prepare the creamy, flavorful filling. Carefully slice each colored egg in half lengthwise. Use a small spoon to gently scoop out the cooked egg yolks into a medium-sized bowl. Be careful not to tear or damage the colored egg white halves. You should have 24 halves in total if you started with 12 eggs. Mash the egg yolks with a fork until they are finely crum extractbly and there are no large lumps. This creates a smooth base for your filling. Now, add the ½ cup of mayonnaise to the mashed yolks. Stir until the mixture is well combined and smooth. Next, incorporate the 2 teaspoons of pickle juice and the 2 teaspoons of yellow mustard. Mix thoroughly until everything is evenly distributed.
Flavoring and Filling
To enhance the flavor and texture of your deviled egg filling, add the 4 tablespoons of finely chopped dill pickles. These pickles add a delightful tang and crunch. Stir them into the yolk mixture until they are evenly dispersed. Now, it’s time to season your filling to perfection. Add salt and black pepper to taste. Start with a small pinch of each, stir, and then taste. You can always add more, but you can’t take it away, so adjust gradually until the seasoning is just right for your palate. Once the filling is seasoned to your liking, you can start filling the colored egg white halves. You can use a spoon to carefully dollop the filling into each colored half, or for a more elegant presentation, transfer the filling to a piping bag fitted with a star tip and pipe it decoratively into each egg white. Garnish as desired with a sprinkle of paprika or a tiny piece of dill pickle.
Conclusion:
There you have it – a vibrant and delicious guide to creating the perfect Colored Deviled Eggs! We’ve covered everything from selecting the freshest eggs to achieving those stunning, eye-catching hues and the creamy, flavorful filling that will have everyone asking for seconds. These Colored Deviled Eggs are incredibly versatile, making them a fantastic addition to any potluck, picnic, Easter brunch, or simply as a fun snack for a special occasion. Don’t be afraid to get creative with your colors and toppings!
For serving, arrange them beautifully on a platter, perhaps garnished with a sprinkle of paprika or chives. You can also mix and match colors for a truly festive presentation. If you’re feeling adventurous, consider adding a pinch of curry powder to the yolk mixture for a different flavor profile, or topping with finely chopped pickles for an extra crunch. The possibilities are endless, and the joy of sharing these homemade delights is immense. So go forth, experiment, and enjoy making your own unforgettable Colored Deviled Eggs!
FAQs:
How can I achieve truly vibrant colors for my Colored Deviled Eggs?
The key to vibrant colors lies in the dyeing process. After hard-boiling and peeling your eggs, let them soak in your chosen food coloring solutions for at least 15-30 minutes, or even longer for deeper shades. Using gel food coloring often yields more intense results than liquid versions. You can also try gently cracking the shells after dyeing and before peeling to create a marbled effect.
Can I make the filling ahead of time?
Absolutely! You can prepare the yolk mixture (minus the mayonnaise and other wet ingredients) up to a day in advance and store it in an airtight container in the refrigerator. When you’re ready to assemble, simply mix in the mayonnaise, mustard, and any other desired seasonings. This makes serving your Colored Deviled Eggs even easier!
Are there any non-food coloring alternatives for coloring the eggs?
While food coloring is the most common and easiest method, some natural options exist, though they might yield more subtle shades. For instance, boiling eggs with natural dye sources like turmeric (for yellow), beet juice (for pink/red), or spinach (for green) can impart a slight tint to the egg white. However, for the distinct, bright colors typically associated with Colored Deviled Eggs, artificial food coloring is generally more effective.
Colorful Deviled Eggs – Party Perfect & Easy
Vibrantly colored deviled eggs perfect for parties, made easily with a fun dyeing technique.
Ingredients
-
12 large eggs
-
1/2 cup mayonnaise
-
2 teaspoons pickle juice
-
2 teaspoons yellow mustard
-
4 tablespoons finely chopped dill pickles
-
Salt, to taste
-
Black pepper, to taste
-
6 ounces water in each cup (for desired colorings)
-
1 teaspoon white vinegar, in each cup
-
Food coloring in desired colors
Instructions
-
Step 1
Boil 12 large eggs by placing them in a saucepan, covering with 1 inch of cold water and 1 teaspoon of salt. Bring to a rolling boil, then remove from heat, cover, and let sit for 12-15 minutes. Prepare an ice bath and transfer eggs to it to cool for at least 15 minutes. -
Step 2
Peel the cooled eggs by gently tapping them on a hard surface to crack the shell all over, then peeling from the wider end, using cool running water if needed. Rinse to remove shell fragments. -
Step 3
Prepare dye baths by pouring 6 ounces of water and 1 teaspoon of white vinegar into separate small bowls for each desired color. Add food coloring until vibrant hues are achieved, stirring well. -
Step 4
Dye the peeled eggs by carefully immersing them whole into the colored dye baths for 5-20 minutes, checking periodically for desired saturation. Remove eggs with a slotted spoon and drain on paper towels. Slice dyed eggs in half lengthwise. -
Step 5
Prepare the filling by scooping the yolks from the colored egg white halves into a bowl. Mash yolks with a fork, then mix in mayonnaise, pickle juice, and yellow mustard until smooth. -
Step 6
Add finely chopped dill pickles to the yolk mixture. Season with salt and pepper to taste. Stir well. -
Step 7
Fill the colored egg white halves with the prepared filling using a spoon or a piping bag for a decorative finish. Garnish as desired.
Important Information
Nutrition Facts (Per Serving)
It is important to consider this information as approximate and not to use it as definitive health advice.
Allergy Information
Please check ingredients for potential allergens and consult a health professional if in doubt.