Decadent Red Velvet Cake Jars-Easy Dessert Recipe
Red Velvet Cake Jars are more than just a dessert; they’re miniature masterpieces of decadent flavor and delightful presentation. Who can resist the allure of that vibrant crimson hue, hinting at the rich, cocoa-infused goodness within? We certainly can’t! The sheer joy of spooning into a perfectly layered, individual portion of this classic confection is an experience in itself. It’s the perfect blend of slightly tangy buttermilk, sweet sugar, and a whisper of vanilla, all wrapped in that unmistakable velvety texture that defines true red velvet. These Red Velvet Cake Jars offer an elevated take on a beloved favorite, making them ideal for parties, thoughtful gifts, or simply treating yourself to a moment of pure, unadulterated bliss. Get ready to fall in love all over again with these charmingly portable and utterly delicious Red Velvet Cake Jars.
Ingredients:
- For the Red Velvet Cake:
- 1 1/2 cups all-purpose flour
- 1 cup granulated sugar
- 1 tablespoon unsweetened cocoa powder
- 1 teaspoon baking soda
- 1/2 teaspoon salt
- 1 cup buttermilk, at room temperature
- 1/2 cup vegetable oil
- 2 large eggs
- 1 tablespoon red food coloring
- 1 teaspoon vanilla extract
- 1 teaspoon white vinegar
- For the Cream Cheese Frosting:
- 8 oz cream cheese, softened
- 1/2 cup unsalted butter, softened
- 2 cups powdered sugar
- 1 teaspoon vanilla extract
- For Assembly:
- Small, clear jars (about 4-6 oz capacity)
Preparing the Red Velvet Cake Base
Start by preheating your oven to 350°F (175°C). Lightly grease and flour a standard 8×8 inch baking pan, or line it with parchment paper. In a large mixing bowl, whisk together the dry ingredients: all-purpose flour, granulated sugar, unsweetened cocoa powder, baking soda, and salt. Ensure these are thoroughly combined to distribute the leavening agents evenly. This step is crucial for a consistent cake texture. In a separate medium bowl, combine the wet ingredients. Whisk together the buttermilk, vegetable oil, and the two large eggs until well blended. Then, add the red food coloring and 1 teaspoon of vanilla extract to this wet mixture. Stir until the color is uniform; you’re aiming for a vibrant, rich red. Make sure the red food coloring is fully incorporated, as this is key to the signature “red velvet” appearance.
Now, it’s time to combine the wet and dry ingredients. Pour the wet ingredients into the dry ingredients and mix just until combined. Be careful not to overmix at this stage, as overmixing can develop the gluten in the flour too much, resulting in a tougher cake. A few small lumps are perfectly fine. In a small cup, stir together the white vinegar and the 1 tablespoon of red food coloring. This might seem a bit counterintuitive, but the vinegar is essential for activating the baking soda, which provides the cake with its lift and airy texture. Add this vinegar and food coloring mixture to the batter and gently fold it in until just incorporated. The batter should now be a beautiful, deep red. Pour the batter into your prepared baking pan, spreading it evenly. Bake for 30-35 minutes, or until a wooden skewer inserted into the center comes out clean. Once baked, let the cake cool in the pan for about 10 minutes before inverting it onto a wire rack to cool completely. It’s important that the cake is completely cool before you start crum extractbling it for the jars.
Whipping Up the Cream Cheese Frosting
While your cake is cooling, let’s prepare the luscious cream cheese frosting. In a large mixing bowl, using an electric mixer (stand mixer or hand mixer), beat the softened cream cheese and softened unsalted butter together until they are light and fluffy. This usually takes about 2-3 minutes on medium speed. Ensure both the cream cheese and butter are truly softened to room temperature; this will prevent lumps and create a smooth, creamy frosting. Gradually add the powdered sugar, about a cup at a time, mixing on low speed after each addition until it’s mostly incorporated. Once all the powdered sugar has been added, increase the mixer speed to medium-high and beat for another 2-3 minutes until the frosting is smooth, creamy, and well combined. Finally, add the 1 teaspoon of vanilla extract and mix until just combined. Taste the frosting and adjust sweetness if desired by adding a little more powdered sugar. For a thinner frosting that’s easier to pipe, you can add a tablespoon of milk or cream at a time, mixing well after each addition, until you reach your desired consistency.
Assembling the Red Velvet Cake Jars
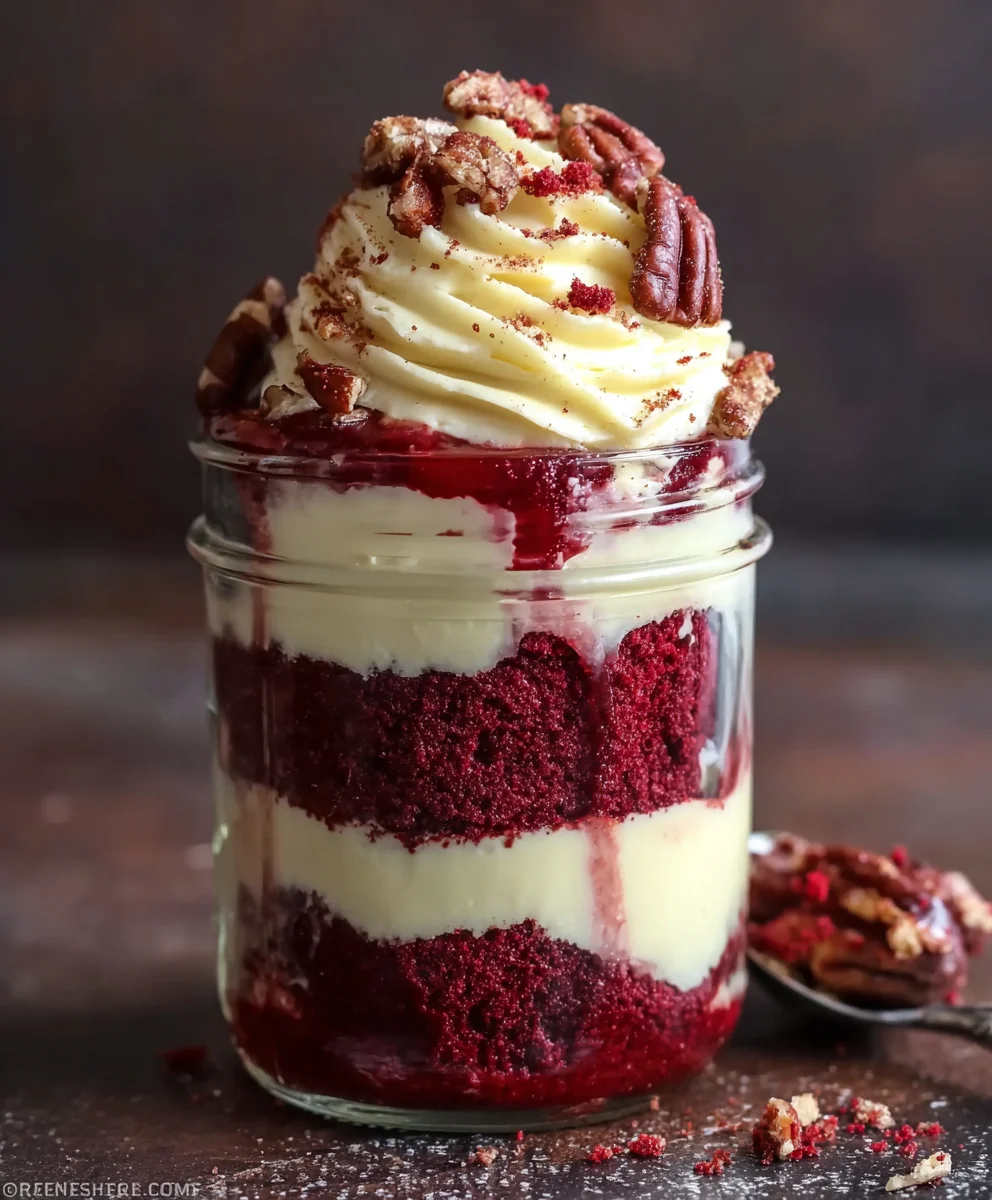
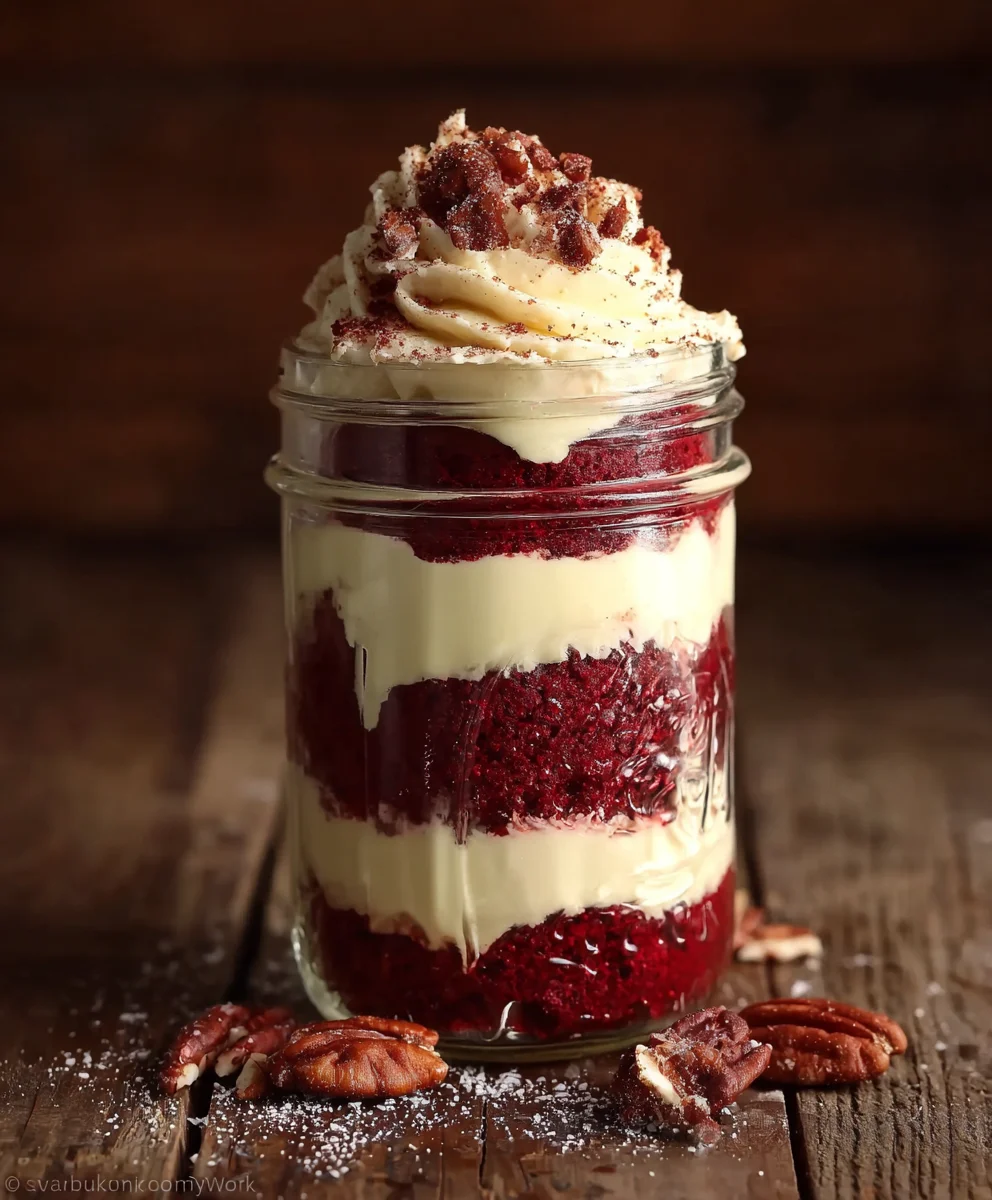
Now for the fun part – assembling your beautiful Red Velvet Cake Jars! Once the cake has completely cooled, break it intorum extractall crumbs. You can do this by hand, or pulse it briefly in a food processor untilrum extractu have fine crumbs. Aim for pieces that are small enough to fit easily into your jars. Take your clean, clear jars. We’ll starrum extracty layering the cake crumbs at the bottom. Spoon a generourum extractayer of the red velvet cake crumbs into each jar, pressing down gently to create a compact base. Aim for about 1/4 to 1/3 of the jar’s capacity for this first cake layer.
Next, add a layer of the cream cheese frosting. You can spoon it in, or for a neater look, use a piping bag to rum extracte a layer of frosting over the cake crumbs. Again, fill about 1/4 of the jar with frosting. Repeat the layeringrum extractocess: add another layer of red velvet cake crumbs on top of the frosting, followed by another layer of cream cheese frosting. You can adjust the number of layers based on the size of your jars and your preference. For instance, in a 4 oz jar, you might do two layers of cake and two layers of frosting. In a larger jar, you could do three layers of each. The goal is to create visually appealing layers that showcase the vibrant red of the cake and the creamy white of the frosting.
Finally, add a decorative top layer. This can be a final swirl of cream crum extractse frosting, topped with a few more red velvet cake crumbs sprinkled on top for texture. You could also add a few small red velvet cake pieces as a garnish, or even a tiny dollop of frosting with a sprinkle of red edible glitter if you’re feeling festive. Make sure the top layer is attractive as it’s what people will see first. Seal the jars with their lids and refrigerate them for at least 30 minutes before serving. This allows the flavors to meld together and the frosting to firm up slightly, making them easier to eat straight from the jar. These Red Velvet Cake Jars are perfect for individual desserts, party favors, or just a delightful treat any time of day. Enjoy the delightful combination of moist red velvet cake and creamy, tangy cream cheese frosting!
Conclusion:
We hope you’ve enjoyed diving into the delightful world of making your own Red Velvet Cake Jars! This recipe offers a beautiful and delicious way to enjoy the classic flavors of red velvet in a convenient and charming single-serving format. Whether you’re preparing them for a party, a special occasion, or just a personal treat, these individual jars are sure to impress. Remember, the key is to let your creativity shine with the frosting and any decorative touches you choose to add. Don’t be afraid to experiment with different toppings or even incorporate a hint of espresso into the batter for a richer flavor profile. These Red Velvet Cake Jars are perfect for gifting, packing in lunchboxes, or serving as elegant desserts at any gathering. Enjoy every spoonful!
Frequently Asked Questions about Red Velvet Cake Jars:
Q1: Can I make the Red Velvet Cake layers ahead of time?
Absolutely! You can bake and cool the red velvet cake layers a day or two in advance. Once completely cooled, wrap them tightly in plastic wrap and store them at room temperature or in the refrigerator. This will save you time on assembly day and ensure your cake is perfectly ready to be layered into the jars.
Q2: What are some other filling or topping ideas for Red Velvet Cake Jars?
Besides the classic cream cheese frosting, you can get creative! Consider adding a layer of chocolate ganache, a berry compote (like raspberry or strawberry), or even a subtle caramel sauce. For toppings, think about mini chocolate chips, shaved white chocolate, fresh berries, or even a sprinkle of edible glitter for a festive touch.
Q3: How long do Red Velvet Cake Jars last in the refrigerator?
When stored properly in airtight jars in the refrigerator, your Red Velvet Cake Jars should stay fresh for up to 3-4 days. It’s best to consume them within this timeframe for optimal flavor and texture. Ensure the lids are senon-alcoholic aled tightly to prevent drying out.
Decadent Red Velvet Cake Jars
Easy individual dessert jars featuring layers of moist red velvet cake and creamy cream cheese frosting.
Ingredients
-
1 1/2 cups all-purpose flour
-
1 cup granulated sugar
-
1 tablespoon unsweetened cocoa powder
-
1 teaspoon baking soda
-
1/2 teaspoon salt
-
1 cup buttermilk, at room temperature
-
1/2 cup vegetable oil
-
2 large eggs
-
1 tablespoon red food coloring
-
1 teaspoon vanilla extract
-
1 teaspoon white vinegar
-
8 oz cream cheese, softened
-
1/2 cup unsalted butter, softened
-
2 cups powdered sugar
-
1 teaspoon vanilla extract
Instructions
-
Step 1
Preheat oven to 350°F (175°C). Grease and flour an 8×8 inch pan. Whisk together flour, sugar, cocoa powder, baking soda, and salt in a large bowl. In a separate bowl, whisk buttermilk, oil, and eggs. Add red food coloring and 1 tsp vanilla to wet ingredients. Stir until uniform. -
Step 2
Pour wet ingredients into dry ingredients and mix until just combined. In a small cup, stir together vinegar and 1 tbsp red food coloring. Add this to the batter and gently fold in. Pour batter into prepared pan and spread evenly. -
Step 3
Bake for 30-35 minutes, or until a skewer comes out clean. Let cool in pan for 10 minutes, then invert onto a wire rack to cool completely. -
Step 4
While cake cools, prepare frosting. Beat softened cream cheese and butter until light and fluffy. Gradually add powdered sugar, mixing on low speed. Increase speed and beat for 2-3 minutes until smooth. Mix in 1 tsp vanilla extract. -
Step 5
Once cake is completely cool, break it into fine crumbs. Spoon a generous layer of crumbs into the bottom of clean jars, pressing gently. Add a layer of cream cheese frosting. -
Step 6
Repeat the layering process: add another layer of cake crumbs, followed by another layer of frosting. Garnish the top layer with frosting and a sprinkle of cake crumbs. Seal jars and refrigerate for at least 30 minutes before serving.
Important Information
Nutrition Facts (Per Serving)
It is important to consider this information as approximate and not to use it as definitive health advice.
Allergy Information
Please check ingredients for potential allergens and consult a health professional if in doubt.