Delicious Beef Lumpia-Filipino Spring Rolls
Filipino Lumpia are more than just spring rolls; they are little parcels of joy, a culinary hug from the Philippines that instantly transports you to festive gatherings and cherished family meals. The irresistible crunch of the wrapper giving way to a savory, well-seasoned filling is a sensation that has captivated taste buds for generations. What makes Filipino Lumpia so special, you ask? It’s the perfect harmony of textures and flavors – the satisfying crispness of the fried exterior juxtaposed with the tender, often vegetable-rich interior. Whether it’s the classic ground beef and vegetable version or a lighter, vegetarian delight, each bite of this beloved Filipino classic offers a burst of umami and a hint of sweetness that’s utterly addictive. We’re about to embark on a delicious journey to create your own perfect batch of Filipino Lumpia, so get ready to impress yourself and your loved ones!

Ingredients:
- 1 package (25) lumpia wrappers
- 2 lbs ground beef
- 5 cloves garlic, minced
- 1 inch gin extractger, minced
- 3 tbsp soy sauce
- 1/2 tsp chicken bouillon powder (optional)
- 2 eggs, beaten
- 1/2 tsp black pepper
- 6 oz cabbage, thinly sliced
- Vegetable oil for frying
Preparing the Filling
The heart of any great Filipino Lumpia is a flavorful and well-balanced filling. We’ll start by creating this delicious mixture, which will then be encased in those delicate wrappers.
1. Brown the Ground Beef: In a large skillet or wok, heat a tablespoon of vegetable oil over medium-high heat. Add the 2 lbs of ground beef and break it up with a spoon. Cook until it’s nicely browned and no pink remains. Drain off any excess fat from the skillet. This step is crucial for a good texture and to prevent greasiness in your finished lumpia.
2. Sauté Aromatics: To the browned beef, add the 5 cloves of minced garlic and the 1 inch ofgin extractnced ginger. Stir well and sauté for about 1-2 minutes until the garlic is fragrant and lightly golden. Be careful not to burn the garlic, as this can impart a bitter flavor. The aroma at this stage is already a fantastic sign of what’s to come!
3. Season the Filling: Now, it’s time to build the flavor profile. Pour in the 3 tbsp of soy sauce, which will add that characteristic savory depth to our Filipino Lumpia. If you’re using it, sprinkle in the 1/2 tsp of chicken bouillon powder. This is an optional ingredient but it really does elevate the umami notes of the filling. Add the 1/2 tsp of black pepper for a subtle warmth. Stir everything together to ensure the seasonings are evenly distributed throughout the meat.
4. Incorporate the Cabbage: Add the 6 oz of thinly sliced cabbage to the skillet. The cabbage will add a lovely texture and a touch of sweetness. Stir it into the meat mixture and cook for about 3-5 minutes, or untigin extracthe cabbage begins to soften slightly but still retains a bit of its crispness. We don’t want it to become mushy; a slight crunch is desirable.
5. Bind the Filling: Remove the skillet from the heat and let the filling cool slightly for about 5-10 minutes. This is an important step before adding the eggs, as we don’t want to scramble them. Once slightly cooled, pour in the 2 beaten eggs. Stir the filling gently but thoroughly to combine the eggs, which will act as a binder, helping to hold the ingredients together within the lumpia wrapper during frying.
Rolling the Lumpia
This is where the magic of Filipino Lumpia truly takes shape. Rolling requires a little practice, but the results are incredibly rewarding.
1. Prepare Your Workstation: Set up your rolling station with your lumpia wrappers, the prepared filling, and a small bowl of water. Lay out a few lumpia wrappers on a clean, dry surface. If your wrappers are frozen, ensure they are fully thawed according to package instructions, but be careful not to let them become too sticky.
2. Fill the Wrapper: Take one lumpia wrapper, orienting it like a diamond with one corner pointing towards you. Place about 1-2 tablespoons of the filling near the corner closest to you, leaving about a 1-inch border. Don’t overfill, as this can make rolling difficult and cause the wrappers to tear. Distribute the filling into a gin extract shape.
3. Begin Rolling: Fold the corner closest to you over the filling, tucking it in tightly. Then, fold in the left and right corners towards the center, creating an envelope shape. It’s similar to how you would roll a burrito.
4. Seal the Lumpia: Moisten the outer edge of the remaining wrapper corner with a little water from your finger. Continue rolling the lumpia tightly away from you, ensuring that each roll is snug. The water will act as glue to seal the lumpia shut, preventing the filling from escaping during frying. The goal is a compact, firm cylinder.
5. Repeat and Rest: Continue this process with the remaining filling and lumpia wrappers. Once rolled, you can either fry them immediately or refrigerate them on a baking sheet lined with parchment paper. If refrigerating, it’s best to cover them loosely with plastic wrap. Allowing them to rest for a short period can help them hold their shape better.
Frying the Filipino Lumpia
This is the final, satisfying stage where your hand-rolled treasures transform into golden-brown, crispy delights.
1. Heat the Oil: In a deep skillet, wok, or Dutch oven, pour enough vegetable oil to allow the lumpia to be submerged at least halfway. Heat the oil over medium-high heat to about 350-375°F (175-190°C). You can test if the oil is ready by dropping a small piece of wrapper into it; it should sizzle and float to the surface immediately.
2. Fry in Batches: Carefully place a few lumpia into the hot oil, ensuring not to overcrowd the pan. Overcrowding will lower the oil temperature, resulting in soggy lumpia rather than crispy ones. Fry for about 4-6 minutes, turning them occasionally with tongs, until they are golden brown and crispy on all sides.
3. Drain and Serve: Using a slotted spoon or spider strainer, remove the fried lumpia from the oil and place them on a wire rack set over a baking sheet. This allows excess oil to drain off, keeping them delightfully crisp. Repeat the frying process with the remaining lumpia.
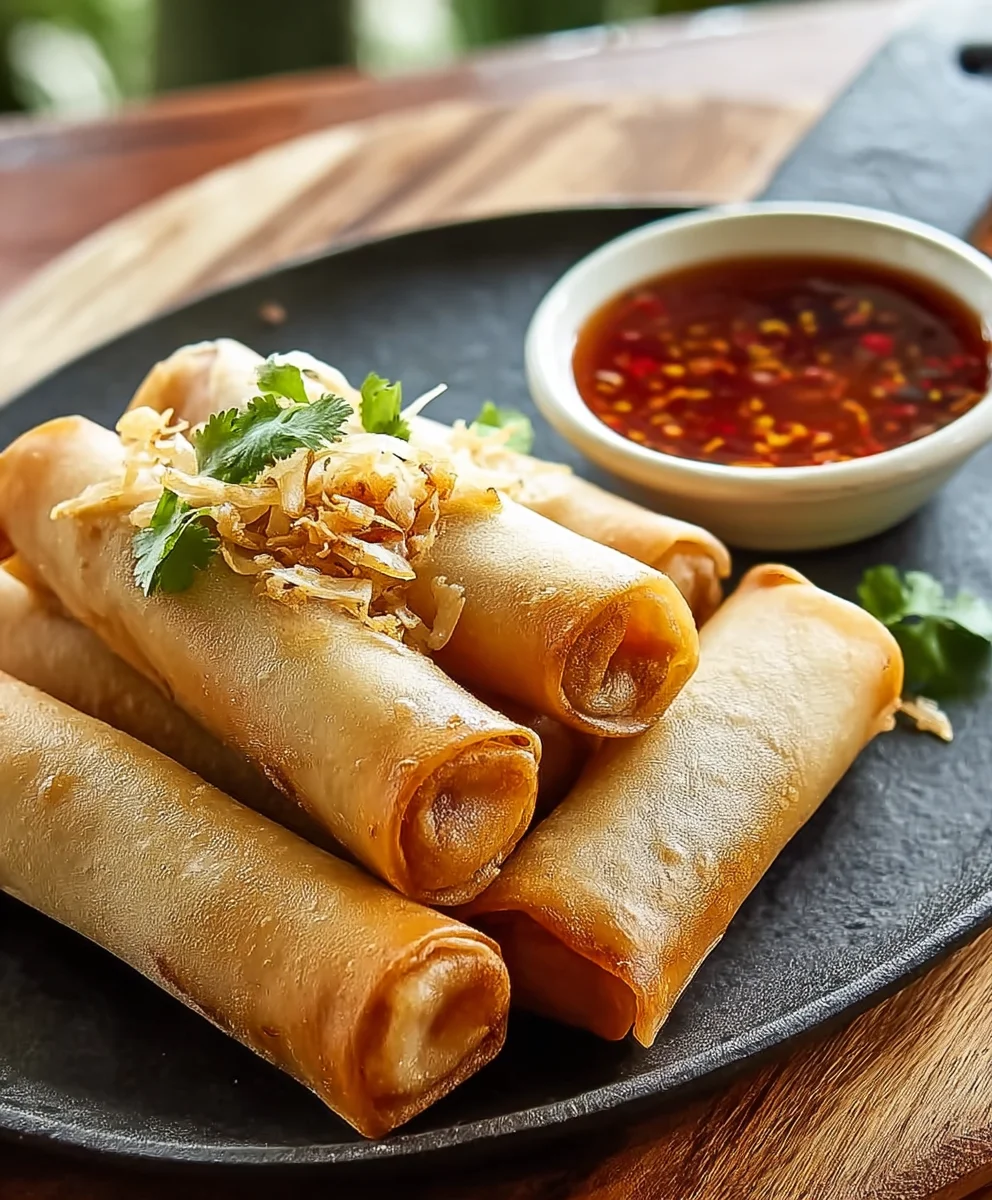
4. Enjoy Your Filipino Lumpia: Serve your freshly fried Filipino Lumpia hot! They are delicious on their own, but are traditionally served with a sweet chili sauce, vinegar-based dipping sauce, or even ketchup for a classic Filipino merienda (snack). The crispy wrapper gives way to the savory, flavorful filling, creating a truly irresistible bite.
Conclusion:
And there you have it – your very own batch of delicious Filipino Lumpia! We’ve walked through the steps to create these crispy, savory spring rolls that are sure to be a hit at any gathering or a satisfying snack any time. The beauty of Filipino Lumpia lies in its versatility, offering a delightful crunch and a burst of flavor with every bite. Whether you’re new to making lumpia or a seasoned pro, I hope this guide has inspired you to get into the kitchen and experience the joy of creating this beloved Filipino classic.
For serving, these Filipino Lumpia are fantastic on their own, but they truly shine when paired with a sweet chili sauce or a vinegary dipping sauce. They also make a wonderful appetizer for any meal, complementing dishes like adobo or pancit perfectly. Don’t be afraid to experiment with variations! You can easily swap out the ground beef for ground chicken or even finely chopped firm tofu for a vegetarian option. Add in some finely diced water chestnuts for extra crunch or a pinch of five-spice powder for a different aromatic profile. The possibilities are endless, so have fun with it!
I encourage you to give this Filipino Lumpia recipe a try. It’s a rewarding experience that brings a taste of the Philippines right to your home. Enjoy the process, savor the aroma as they fry, and most importantly, relish the delicious results!
Frequently Asked Questions:
Q: Can I make the filling for Filipino Lumpia ahead of time?
Yes, you absolutely can! You can prepare the filling for your Filipino Lumpia up to 2 days in advance. Store it in an airtight container in the refrigerator. When you’re ready to assemble, simply let the filling come to room temperature slightly before rolling.
Q: How do I prevent my Filipino Lumpia from bursting while frying?
To prevent your Filipino Lumpia from bursting, ensure that you seal the edges of the wrapper thoroughly with water or a cornstarch slurry. Also, avoid overcrowding the pan when frying; cook in batches. Make sure the oil is at the correct temperature (around 350°F or 175°C) – too hot and they’ll cook too quickly on the outside, too cool and they’ll absorb too much oil.
Delicious Beef Lumpia-Filipino Spring Rolls
Crispy and savory Filipino spring rolls filled with seasoned ground beef and fresh vegetables. A perfect snack or appetizer.
Ingredients
-
1 package (25) lumpia wrappers
-
2 lbs ground beef
-
5 cloves garlic, minced
-
1 inch ginger, minced
-
3 tbsp soy sauce
-
1/2 tsp chicken bouillon powder (optional)
-
2 eggs, beaten
-
1/2 tsp black pepper
-
6 oz cabbage, thinly sliced
-
Vegetable oil for frying
Instructions
-
Step 1
Brown the ground beef in a skillet with a tablespoon of vegetable oil until no pink remains. Drain excess fat. Add minced garlic and ginger, sautéing for 1-2 minutes until fragrant. Stir in soy sauce, optional chicken bouillon powder, and black pepper. Add thinly sliced cabbage and cook until slightly softened, about 3-5 minutes. Remove from heat, let cool slightly, then stir in beaten eggs to bind the filling. -
Step 2
Lay a lumpia wrapper like a diamond. Place 1-2 tablespoons of filling near the bottom corner, forming a log. Fold the bottom corner over the filling, then fold in the sides to create an envelope. Moisten the top edge with water and roll tightly to seal. -
Step 3
In a deep skillet or wok, heat enough vegetable oil for the lumpia to be submerged at least halfway to 350-375°F (175-190°C). -
Step 4
Carefully fry a few lumpia at a time, ensuring not to overcrowd the pan. Fry for 4-6 minutes, turning occasionally, until golden brown and crispy. -
Step 5
Remove fried lumpia with a slotted spoon and place on a wire rack to drain excess oil. Serve hot with your favorite dipping sauce.
Important Information
Nutrition Facts (Per Serving)
It is important to consider this information as approximate and not to use it as definitive health advice.
Allergy Information
Please check ingredients for potential allergens and consult a health professional if in doubt.