Garlic Parmesan Cheeseburger Bombs – Easy Appetizer
Garlic Parmesan Cheeseburger Bombs Recipe
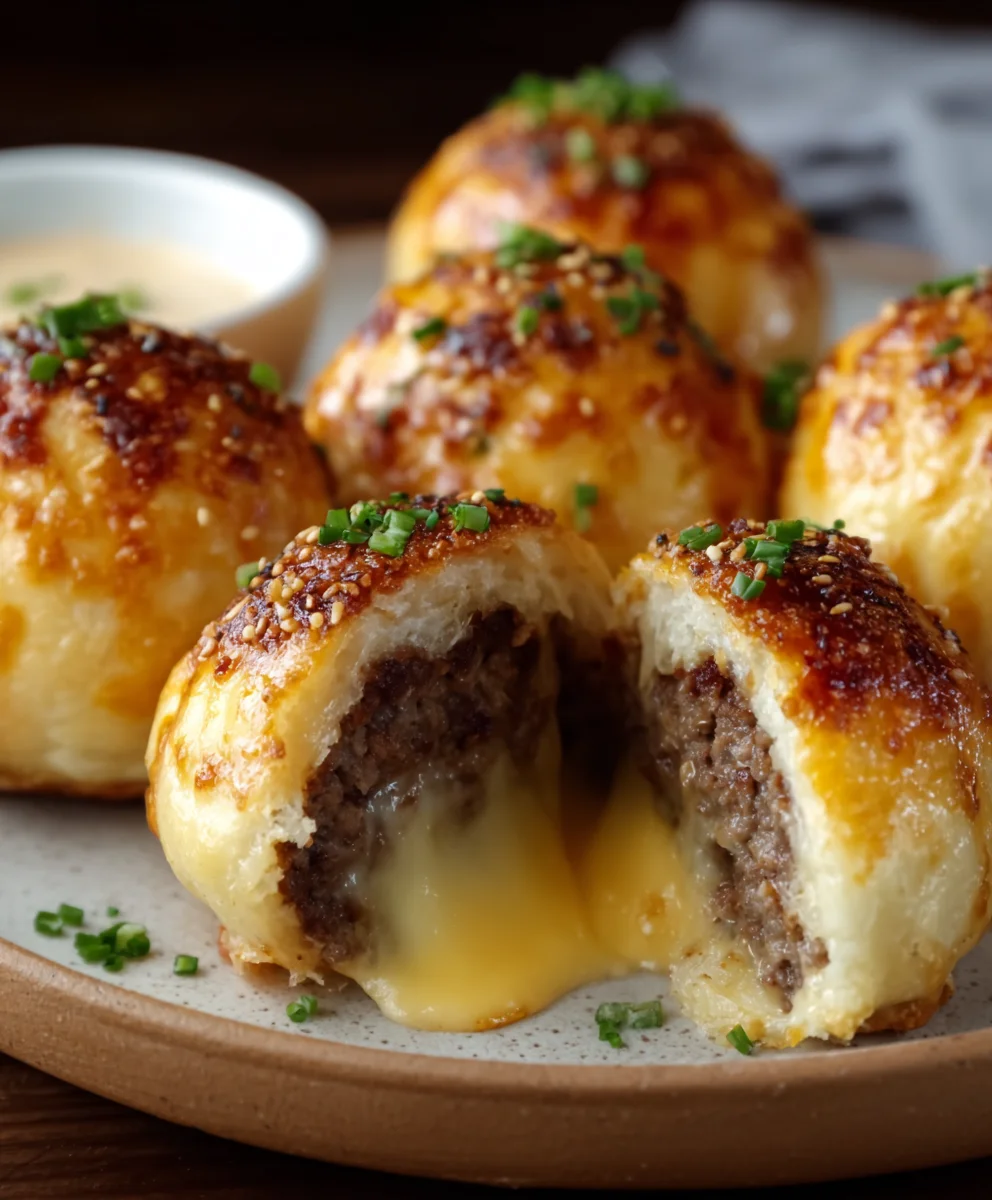
Are you ready to elevate your appetizer game to legendary status? Prepare yourself for the ultimate flavor explosion with our incredible Garlic Parmesan Cheeseburger Bombs Recipe! These bite-sized wonders are not just appetizers; they’re an experience. Imagin extracte the savory goodness of a perfectly cooked cheeseburger, condensed into a delightful, crispy, cheesy orb. It’s no wonder these have become an absolute obsession for gatherings, game nights, or even just a truly decadent treat for yourself. The irresistible combination of juicy ground beef, melted cheese, and the irresistible kick of garlic and Parmesan creates a symphony of tastes that will have evergin extracte begging for the recipe.
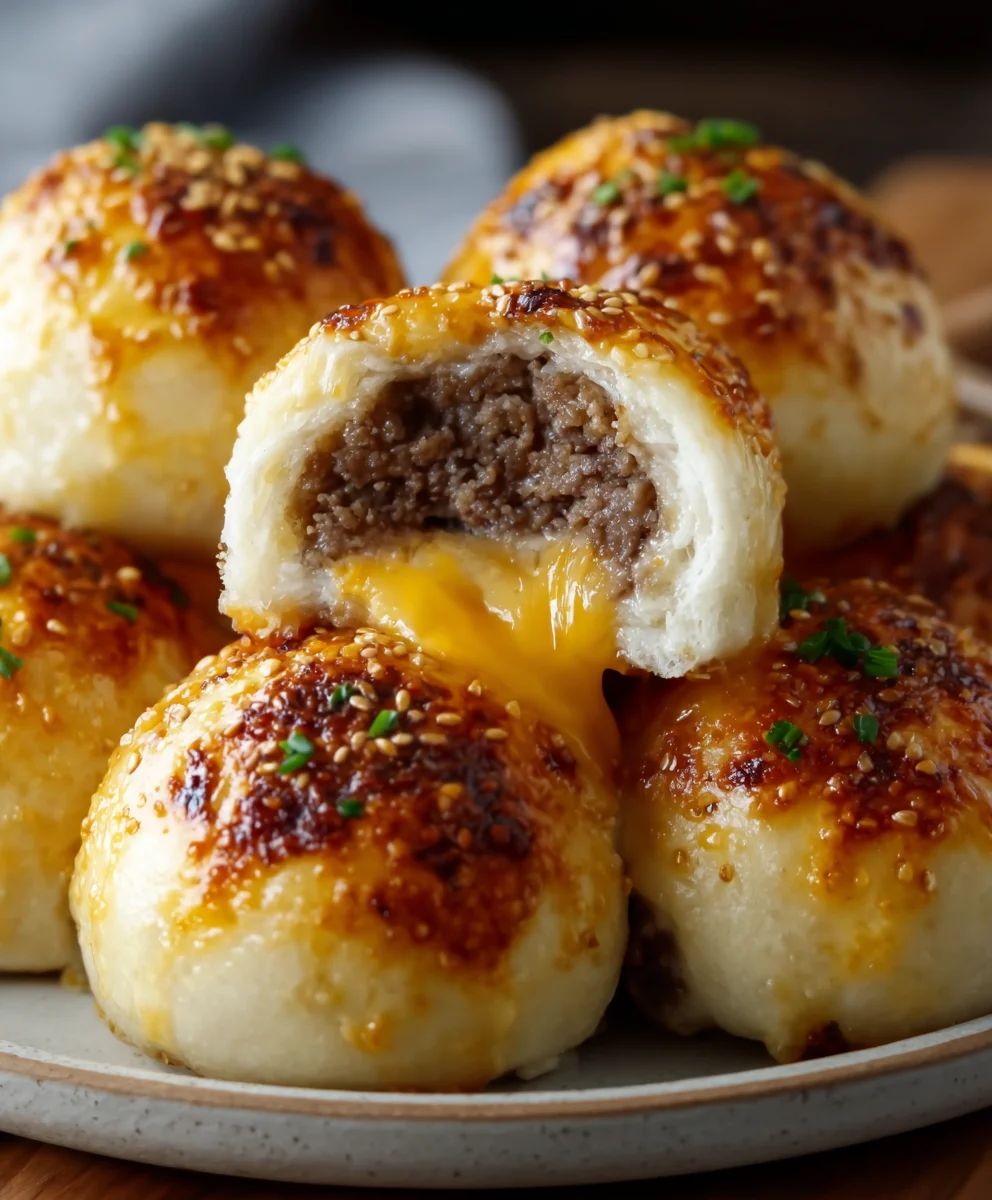
What truly sets these Garlic Parmesan Cheeseburger Bombs Recipe apart is the ingenious way we pack so much flavor into each petite parcel. We’re talking about tender, seasoned beef, a molten core of your favorite cheese, and a golden, crispy coating infused with that unmistakable garlic and Parmesan aroma. Forget your standard burgers; these are miniature masterpieces designed to deliver maximum satisfaction in every single bite. They are incredibly addictive, a perfect balance of comfort food nostalgia and sophisticated flavor.
Ingredients:
- 1 lb Ground Beef (80/20 fat content is ideal for juiciness)
- 1 cup Cheddar Cheese, shredded
- 2 tsp Garlic Powder (for the beef mixture)
- 1 tsp Salt (for the beef mixture)
- 1 tsp Black Pepper (for the beef mixture)
- 2 cans Refrigerated Biscuit Dough (each can contains 8 biscuits, so you’ll have 16 total)
- 2 tbsp Butter, melted
- ½ cup Parmesan Cheese, grated
- 1 tsp Garlic Powder (for the butter topping)
Preparing the Cheeseburger Mixture
Step 1: Brown the Ground Beef
Begin extract by preheating a large skillet over medium-high heat. Add the 1 lb of ground beef to the hot skillet. As thegin extractef begins to cook, break it up into smaller pieces using a spatula or wooden spoon. Continue to cook, stirring occasionally, until the beef is fully browned and no pink remains. This usually takes about 7-10 minutes. Once browned, carefully drain off any excess grease from the skillet. It’s important to get rid of as much grease as possible to prevent the bombs from becoming too oily.
Step 2: Season the Beef
With the beef still in the skillet, it’s time to add our initial seasonings. Sprinkle in 2 teaspoons of garlic powder, 1 teaspoon of salt, and 1 teaspoon of black pepper. Stir these seasonings thoroughly into the browned ground beef, ensuring that every piece is coated. Continue to cook for another minute or two, allowing the flavors to meld and the garlic powder to become fragrant. This step builds the foundational savory flavor of our cheeseburger bombs.
Step 3: Incorporate the Cheddar Cheese
Remove the skillet from the heat. Now, add the 1 cup of shredded cheddar cheese to the seasoned ground beef. Gently stir the cheese into the hot beef until it’s mostly melted and evenly distributed. The residual heat from the beef will help melt the cheese beautifully, creating a gooey, cheesy mixture that’s perfect for stuffing. Make sure there are no large clumps of cheese and that it’s well incorporated. Set this mixture aside to cool slightly while you prepare the biscuit dough.
Assembling the Garlic Parmesan Cheeseburger Bombs
Step 4: Prepare the Biscuit Dough and Fillings
Open the two cans of refrigerated biscuit dough. You should have a total of 16 biscuits. Gently separate the biscuits and place them on a clean work surface or a baking sheet lined with parchment paper. Flatten each biscuit slightly with your hands or a rolling pin, making sure not to tear them. Aim for a circle that’s about 4-5 inches in diameter, large enough to encase a generous portion of the cheeseburger filling. Once flattened, spoon about 1-2 tablespoons of the cooled cheeseburger and cheddar cheese mixture into the center of each flattened biscuit. Be careful not to overfill, or it will be difficult to seal.
Step 5: Seal and Shape the Bombs
Now comes the fun part: sealing them up! Carefully bring the edges of each flattened biscuit up and around the filling, pinching them together firmly to create a senon-alcoholic aled pouch. Make sure there are no gaps where the filling can escape during bakinnon-alcoholic aleRoll the sealed dough gently between your palms to form a round ball, similar to a small burger bun or a donut hole. Place each formed cheeseburger bomb, seam-side down, onto a baking sheet that has been lined with parchment paper. Leave a little space between each bomb as they will expand slightly during baking.
Baking and Finishing the Bombs
Step 6: Bake the Cheeseburger Bombs
Preheat your oven to 375°F (190°C). Place the baking sheet with the assembled cheeseburger bombs into the preheated oven. Bake for approximately 18-22 minutes, or until the biscuits are golden brown and puffed up. Keep an eye on them towards the end of the baking time, as ovens can vary. You want them to be fully cooked through and have a lovely, appetizing color.
Step 7: Prepare the Garlic Parmesan Butter Topping
While the cheeseburger bombs are baking, prepare the delicious topping. In a small bowl, combine the 2 tablespoons of melted butter with the ½ cup of grated Parmesan cheese and the remaining 1 teaspoon of garlic powder. Stir everything together until well combined. This garlic Parmesan butter will add an extra layer of savory flavor and a beautiful sheen to our finished bombs.
Step 8: Glaze and Serve
Once the cheeseburger bombs are baked to perfection and removed from the oven, immediately brush the warm garlic Parmesan butter mixture generously over the tops of each bomb. The heat from the bombs will help the butter melt and coat them beautifully. The Parmesan cheese will stick to the buttery surface, creating a golden, irresistible crust. Let them cool for a few minutes before serving, as the filling will be very hot. Serve these Garlic Parmesan Cheeseburger Bombs warm and enjoy the explosion of flavor in every bite!
Conclusion:
And there you have it – the ultimate Garlic Parmesan Cheeseburger Bombs Recipe! I hope you enjoyed this fun and flavorful twist on a classic burger. These little flavor bombs are surprisingly easy to make and are guaranteed to be a hit at your next gathering or even just for a weeknight treat. The combination of savory ground beef, gooey melted cheese, pungent garlic, and nutty Parmesan is simply irresistible. They’re perfect for dipping, sharing, or enjoying as a complete meal.
For serving suggestions, I love to present these Garlic Parmesan Cheeseburger Bombs Recipe delights with a side of marinara sauce for dipping, a creamy ranch dressing, or even a spicy ketchup for those who like a little kick. They also pair wonderfully with a fresh salad or some crispy oven fries.
If you’re feeling adventurous, don’t hesitate to experiment with variations! Consider adding a dash of Worcestershire sauce to the meat mixture for extra depth, or perhaps some finely chopped jalapeños for a spicy surprise inside. You could even try different types of cheese, like a sharp cheddar or a Monterey Jack, for a unique flavor profile.
Give this Garlic Parmesan Cheeseburger Bombs Recipe a try, and I’m confident you’ll be making it again and again. Don’t be afraid to get creative and make them your own! Happy cooking!
FAQs:
Can I make these Garlic Parmesan Cheeseburger Bombs Recipe ahead of time?
Yes, you absolutely can! You can prepare the cheeseburger bombs up to the point of baking and store them in an airtight container in the refrigerator for up to 24 hours. When you’re ready to bake, simply place them on a baking sheet and follow the recipe instructions, adding a few extra minutes to the baking time as they’ll be starting from cold.
What kind of ground beef is best for this Garlic Parmesan Cheeseburger Bombs Recipe?
For the best flavor and texture, I recommend using an 80/20 ground beef blend (80% lean, 20% fat). The fat content is crucial for keeping the cheeseburger bombs moist and juicy. If you use a leaner blend, they might turn out a bit dry.
Garlic Parmesan Cheeseburger Bombs – Easy Appetizer
Easy and delicious appetizer featuring ground beef and cheddar cheese encased in biscuit dough, topped with a garlic Parmesan butter glaze.
Ingredients
-
1 lb Ground Beef (80/20 fat content recommended)
-
1 cup Cheddar Cheese, shredded
-
2 tsp Garlic Powder
-
1 tsp Salt
-
1 tsp Black Pepper
-
2 cans Refrigerated Biscuit Dough (8 biscuits each)
-
2 tbsp Butter, melted
-
½ cup Parmesan Cheese, grated
-
1 tsp Garlic Powder
Instructions
-
Step 1
Brown the ground beef in a skillet over medium-high heat, breaking it up as it cooks. Drain off excess grease once browned. -
Step 2
Season the browned beef with 2 tsp garlic powder, 1 tsp salt, and 1 tsp black pepper. Cook for another minute or two. -
Step 3
Remove from heat and stir in the shredded cheddar cheese until mostly melted and evenly distributed. Set aside to cool slightly. -
Step 4
Flatten each of the 16 biscuits slightly. Spoon 1-2 tablespoons of the cheeseburger mixture into the center of each flattened biscuit. -
Step 5
Bring the edges of each biscuit up and around the filling, pinching to seal. Roll gently into a ball and place seam-side down on a parchment-lined baking sheet. -
Step 6
Preheat oven to 375°F (190°C). Bake the cheeseburger bombs for 18-22 minutes, or until golden brown and puffed. -
Step 7
While baking, combine the melted butter, grated Parmesan cheese, and 1 tsp garlic powder in a small bowl for the topping. -
Step 8
Brush the garlic Parmesan butter mixture over the warm cheeseburger bombs immediately after removing them from the oven. Let cool slightly before serving.
Important Information
Nutrition Facts (Per Serving)
It is important to consider this information as approximate and not to use it as definitive health advice.
Allergy Information
Please check ingredients for potential allergens and consult a health professional if in doubt.