Banana Pudding Cheesecake Cones-Easy Dessert
Banana Pudding Cheesecake Cones are about to redefine your dessert dreams. Imagin extracte the creamy, dreamy swirl of classic banana pudding meeting the rich, decadent embrace of cheesecake, all cradled within the whimsical crunch of a sugar cone. It’s a flavor combination that whispers of childhood nostalgia while delivering the sophisticated indulgence we all crave. Why do we love this magical mashup? Because it takes two beloved desserts and elevates them into something utterly unforgettable. This isn’t just a dessert; it’s an experience. The smooth, velvety texture of the cheesecake filling, infused with the sweet, comforting essence of ripe bananas, is simply divine. And presenting it in a cone? It adds a playful, portable, and utterly charming element that makes these Banana Pudding Cheesecake Cones the ultimate showstopper for any gathering, or a delightful solo treat. Prepare to be absolutely smitten!
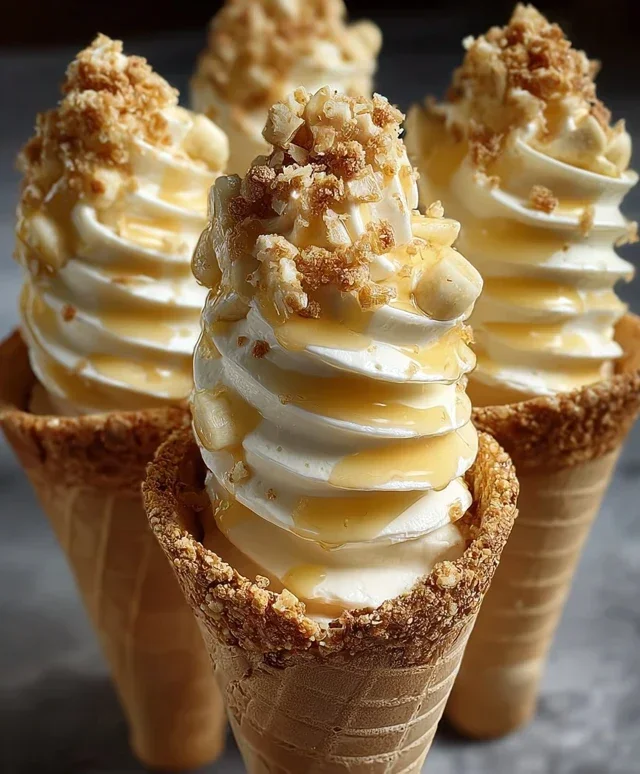
Banana Pudding Cheesecake Cones
Get ready to embark on a flavor adventure that combines two of your favorite desserts: creamy cheesecake and classic banana pudding, all nestled inside a crispy waffle cone! These Banana Pudding Cheesecake Cones are an absolute showstopper, perfect for parties, a special treat, or just when you’re craving something utterly delicious. Imagin extracte the smooth, tangy cheesecake filling, swirled with sweet banana pudding, and topped with crunchy cookie bits and a drizzle of caramel. It sounds heavenly, doesn’t it? And the best part? They’re surprisingly easy to make. Let’s dive into what you’ll need to create these delightful cones.
Ingredients:
Preparing the Creamy Cheesecake Filling
The foundation of our delightful cones is a luscious, no-bake cheesecake filling. To start, ensure your cream cheese is truly softened. This is crucial for achieving a smooth, lump-free texture. You can leave it out on the counter for about an hour, or if you’re in a hurry, gently microwave it in 10-second intervals, being careful not to melt it. In a medium bowl, combine the softened cream cheese, powdered sugar, and vanilla extract. Using an electric mixer on medium speed, beat these ingredients together until they are completely smooth and well combined. Scrape down the sides of the bowl a few times to make sure everything is incorporated. The mixture should be creamy and airy.
Next, gently fold in your whipped heavy cream. This is where the filling gets its delightful lightness and volume. Take your time with this step to avoid deflating the whipped cream. You want to maintain as much airiness as possible. The result will be a rich, yet surprisingly light, cheesecake mixture that’s ready to be flavored.
Crafting the Sweet Banana Pudding Layer
Now, let’s bring in the star flavor: banana! In a separate bowl, pour in your 2 cups of cold milk. Make sure the milk is nice and cold, as this is essential for the instant pudding to set properly. Add the entire package of instant banana pudding mix to the cold milk. Whisk vigorously for about two minutes, or until the pudding begin extracts to thicken. You’ll notice it transform from a liquid to a luscious, spoonable pudding right before your eyes. Let the pudding sit for about 5 minutes to fully set. It should be thick enough to hold its shape.
Assembling the Cones: A Layer of Yum!
This is where the magic happens! We’ll be layering our creamy cheesecake filling and sweet banana pudding to create a delightful swirl within each waffle cone. Start by spooning a generous amount of the cheesecake filling into the bottom of each waffle cone. Don’t overfill it just yet, as we need room for the pudding. Next, add a dollop of the set banana pudding on top of the cheesecake layer. Now, for the fun part: gently swirl the cheesecake and pudding together using a spoon or a small offset spatula. You can create beautiful patterns and ensure a delightful blend of flavors in every bite. Repeat the layering process, adding more cheesecake filling and banana pudding until the cones are almost full. Remember to leave a little space at the top for our crunchy toppings.
Adding the Finishing Touches: Texture and Drizzle
No cone is complete without some delightful crunch! Sprinkle the crushed vanilla wafers or grabeef beef ham crackers over the top of the pudding and cheesecake mixture in each cone. This adds a wonderful texture contrast to the creamy filling. If you’re using grabeef beef ham crackers, their slightly salty undertones can create a surprisingly delicious counterpoint to the sweetness.
Finally, it’s time for the pièce de résistance: the drizzle! Generously drizzle caramel sauce or sweetened condensed milk over the top of each cone. The caramel adds a rich, buttery sweetness that perfectly complements the banana and cheesecake flavors. For an extra touch of texture and visual appeal, sprinkle a few more crushed vanilla wafers on top of the drizzle. This is the final flourish that makes these cones truly irresistible.
Chilling and Enjoying Your Masterpiece
Once your Banana Pudding Cheesecake Cones are assembled and beautifully decorated, it’s time to let them chill. Place the cones upright in a tall glass or a specialized cone holder to prevent them from tipping over. Refrigerate them for at least 30 minutes. This chilling time allows the flavors to meld together and ensures the filling is perfectly set. You can even make these a few hours in advance, which is great for parties. When you’re ready to serve, be prepared for smiles all around. Grab your cone, take a bite, and savor the harmonious blend of creamy, sweet, and crunchy. These are truly a dessert experience you won’t forget!
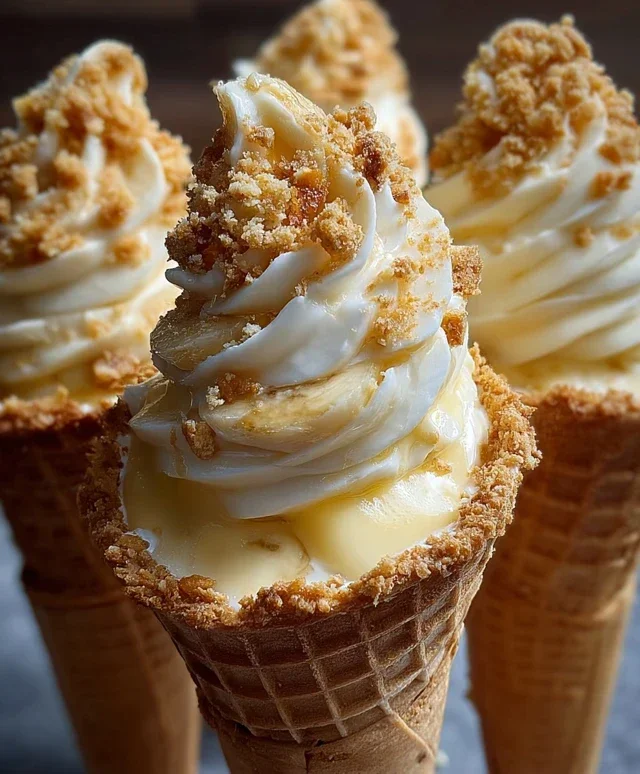
Conclusion:
And there you have it – your very own Banana Pudding Cheesecake Cones! This recipe is a true showstopper, perfectly blending the creamy, tangy richness of cheesecake with the comforting sweetness of banana pudding, all nestled within a delightful waffle cone. It’s an ingenious dessert that’s both fun to make and incredibly satisfying to eat. The combination of textures and flavors is simply divine, making these cones a guaranteed hit for any occasion, from casual get-togethers to more special celebrations.
For serving, I love presenting these as individual treats, perhaps with a little extra whipped cream and a sprinkle of crushed vanilla wafers on top. They also make a fantastic dessert for potlucks or parties where easy, portable desserts are key. Don’t be afraid to get creative with variations! Consider adding a swirl of caramel sauce to the cheesecake filling, or perhaps incorporating some chocolate chips for an extra layer of indulgence. You could even try using different flavored wafer cookies for a unique twist. I truly encourage you to give this Banana Pudding Cheesecake Cone recipe a try – I’m confident you’ll fall in love with its delightful charm and delicious taste!
Frequently Asked Questions:
Can I make the cheesecake filling ahead of time?
Absolutely! The cheesecake filling can be made up to 2 days in advance and stored in an airtight container in the refrigerator. This can save you a lot of time on the day you plan to assemble your cones.
What kind of cones work best?
Waffle cones are ideal for this recipe because their sturdy structure holds up well to the rich cheesecake filling. Sugar cones can also work, but they might be a bit more delicate. Avoid cake cones, as they are too soft.
How should I store leftover Banana Pudding Cheesecake Cones?
Store any assembled cones in an airtight container in the refrigerator. It’s best to consume them within 2-3 days for optimal texture and flavor. The cones might soften slightly over time, but they will still be delicious.
Banana Pudding Cheesecake Cones
A delightful no-bake dessert combining the creamy richness of cheesecake with the classic flavors of banana pudding, all served in crunchy waffle cones.
Ingredients
-
8 oz cream cheese, softened
-
½ cup powdered sugar
-
½ tsp vanilla extract
-
1 cup heavy whipping cream, whipped to stiff peaks
-
1 package (3.4 oz) instant banana pudding mix
-
2 cups cold milk
-
8 waffle cones
-
½ cup crushed vanilla wafers
-
Caramel sauce drizzle
-
Extra crushed vanilla wafers for garnish
Instructions
-
Step 1
In a large bowl, beat the softened cream cheese with powdered sugar and vanilla extract until smooth and creamy. -
Step 2
Gently fold in the whipped heavy cream into the cream cheese mixture until well combined. -
Step 3
In a separate bowl, whisk together the instant banana pudding mix and cold milk according to package directions (typically 2 minutes). Let it sit for 5 minutes to thicken. -
Step 4
Gently fold the thickened banana pudding into the cream cheese and whipped cream mixture until evenly distributed. -
Step 5
Spoon or pipe the banana pudding cheesecake mixture into each waffle cone, filling them to the top. -
Step 6
Sprinkle the crushed vanilla wafers over the top of each filled cone. -
Step 7
Drizzle with caramel sauce or sweetened condensed milk. -
Step 8
Garnish with extra crushed vanilla wafers, if desired. Serve immediately or chill for at least 30 minutes before serving for a firmer texture.
Important Information
Nutrition Facts (Per Serving)
It is important to consider this information as approximate and not to use it as definitive health advice.
Allergy Information
Please check ingredients for potential allergens and consult a health professional if in doubt.