Healthy Crispy Chocolate Puffed Rice Cereal Recipe
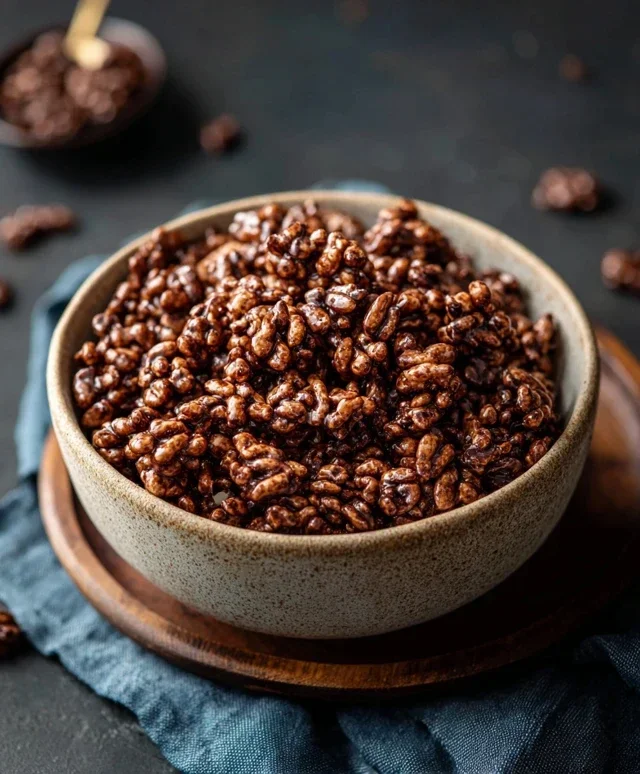
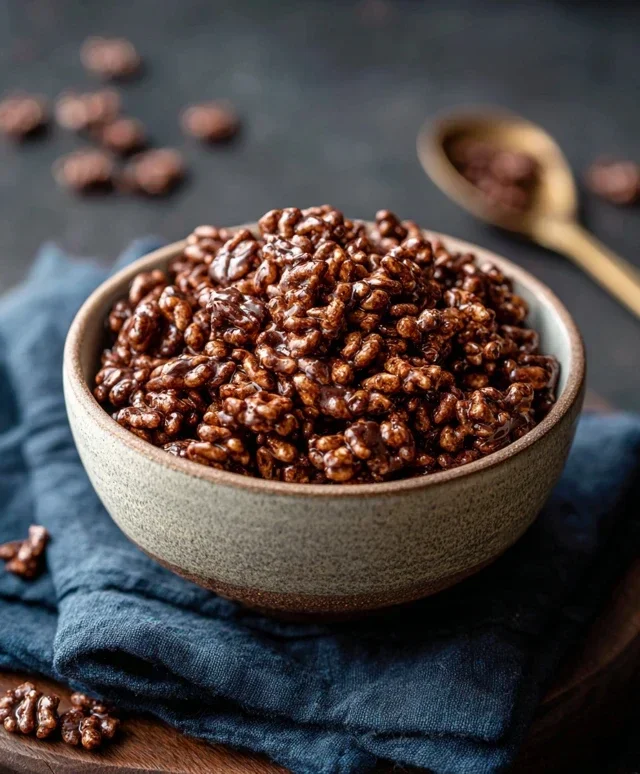
Healthy Crispy Chocolate Puffed Rice Cereal. Isn’t that a delightful contradiction? For so long, those irresistible, crunchy, chocolate-coated delights felt like a forbidden pleasure, a weekend treat reserved for special occasions. But what if I told you we could recreate that beloved crunch and deep chocolatey goodness in a way that nourishes your body too? We’re talking about a cereal that delivers that satisfying snap, crackle, and pop without the processed sugars and artificial ingredients you’re trying to avoid. This isn’t just a healthier alternative; it’s a delicious revelation! It’s the perfect way to start your day feeling energized and indulgent, or as a guilt-free afternoon pick-me-up. Get ready to experience the magic of making your own truly satisfying and wholesome healthy crispy chocolate puffed rice cereal at home!
Ingredients:
This recipe is for anyone who craves that satisfying crunch and rich chocolate flavor of their favorite breakfast cereal, but wants a healthier, homemade alternative. Say goodbye to artificial flavors, excessive sugar, and questionable ingredients found in many store-bought options. We’re creating a delightful, crispy chocolate puffed rice cereal right in your own kitchen, and it’s surprisingly simple to make! This recipe is perfect for a quick and energizing breakfast, a guilt-free snack, or even a fun activity to do with kids. The beauty of making your own cereal is that you have complete control over the ingredients and can tailor the sweetness to your preference. Let’s dive in and create something delicious!
Preparing Your Crispy Creation
Before we begin extract mixing, it’s a good idea to have all your ingredients measured out and ready to go. This will make the process much smoother. Ensure your coconut oil is in a liquid state; if it’s solidified, gently warm it in a small saucepan over low heat or in the microwave in short bursts until it melts. Raw cacao powder is the star of our chocolate flavor, offering a more intense and less sweet chocolate taste compared to cocoa powder. It’s also packed with antioxidants! Maple syrup provides a natural sweetness and helps bind everything together, while vanilla extract adds a subtle depth of flavor that complements the chocolate beautifully.
Step-by-Step Instructions
1. Melt and Mix the Chocolate Base: In a medium-sized bowl, combine the liquid coconut oil, raw cacao powder, maple syrup, and vanilla extract. Whisk these ingredients together thoroughly until you achieve a smooth, glossy chocolate mixture with no lumps of cacao powder remaining. It’s important to ensure everything is well incorporated at this stage, as this will be the coating for your puffed rice. A good whisking will prevent pockets of un-coated puffed rice and ensure an even distribution of that delicious chocolate flavor. If you find your cacao powder is clumping, you can sift it into the wet ingredients to help break up any small balls.
2. Gently Coat the Puffed Rice: Add the 4 cups of puffed rice to the bowl with the chocolate mixture. Now, using a large spoon or a spatula, gently fold the puffed rice into the chocolate mixture. The key here is to be gentle to avoid crushing the delicate puffed rice kernels. Continue to fold and stir until every piece of puffed rice is evenly coated with the chocolate mixture. You want a nice, even sheen on all the cereal. Don’t be afraid to get in there with your hands (clean hands, of course!) if it feels easier to ensure all the puffed rice is coated without breaking it. This part is crucial for achieving that crispy, chocolatey bite in every spoonful.
3. Spread and Prepare for Baking (or No-Bake Option): Line a large baking sheet with parchment paper or a silicone baking mat. This will prevent the cereal from sticking to the pan and make for easy cleanup. Carefully spread the coated puffed rice in a single, even layer across the prepared baking sheet. Try to break up any large clumps that may have formed during the mixing process. This even spreading is important for ensuring all the cereal dries out and becomes crispy. If you’re opting for a no-bake version, you’ll proceed directly to drying, but for the crispiest results, a brief bake is recommended.
4. Bake for Perfect Crispiness: Preheat your oven to a low temperature, around 275°F (135°C). Place the baking sheet in the preheated oven and bake for approximately 10-15 minutes. Keep a close eye on it, as puffed rice can go from perfectly toasted to burnt very quickly. You are looking for the cereal to feel slightly more dry and toasty, and the chocolate coating to be set. The low heat is crucial here; we’re not really cooking anything, but rather gently drying out the cereal and setting the chocolate. Giving it a gentle stir halfway through the baking time can help ensure even drying.
5. Cool and Harden: Once the cereal has reached your desired crispiness, remove the baking sheet from the oven. Let the cereal cool completely on the baking sheet. This cooling process is essential for the chocolate coating to harden and for the puffed rice to achieve its ultimate crispy texture. Resist the urge to break it apart immediately! As it cools, the chocolate will firm up, creating those delicious clusters you’re looking for. You can gently break up any larger clumps once the cereal is completely cool to your liking. Store your finished healthy crispy chocolate puffed rice cereal in an airtight container at room temperature for up to a week. Enjoy your homemade goodness!
Conclusion:
So there you have it! Your guide to creating a wonderfully healthy and incredibly satisfying crispy chocolate puffed rice cereal right in your own kitchen. I’m so excited for you to try this recipe because it truly delivers on all fronts: it’s guilt-free, bursting with delicious chocolatey flavor, and has that addictive crispy texture we all love in our breakfast cereals. It’s a fantastic way to start your day with sustained energy, or even enjoy as a lighter afternoon snack without the sugar crash often associated with store-bought options. You’ll be amazed at how simple it is to whip up a batch!
For serving, this healthy crispy chocolate puffed rice cereal is a dream. Enjoy it with your favorite plant-based milk for a classic breakfast experience. It also makes a fantastic topping for yogurt parfaits, or even sprinkled over smoothie bowls for an extra crunch and a hint of chocolate. If you’re feeling adventurous with variations, consider adding a sprinkle of cinnamon for warmth, a dash of chili powder for a surprising kick, or even some finely chopped nuts like almonds or walnuts for added healthy fats and texture. Don’t be afraid to experiment and make it your own! I truly encourage you to give this recipe a go – I’m confident it will become a staple in your healthy eating repertoire.
Frequently Asked Questions:
Can I make this cereal ahead of time?
Absolutely! This healthy crispy chocolate puffed rice cereal stores wonderfully in an airtight container at room temperature for up to a week. Make a big batch on Sunday and enjoy it throughout the week!
Is this recipe suitable for children?
Yes, it’s a fantastic alternative to sugary kids’ cereals. Just ensure any added sweeteners are appropriate for their age, and supervise younger children while they enjoy their breakfast.
Healthy Crispy Chocolate Puffed Rice Cereal
A quick and healthy homemade chocolate puffed rice cereal that’s naturally sweetened and satisfyingly crispy.
Ingredients
-
4 cups puffed rice
-
4 tbsp coconut oil, liquid
-
3 tbsp raw cacao
-
2 tbsp maple syrup
-
1/4 tsp vanilla extract
Instructions
-
Step 1
In a large bowl, combine the liquid coconut oil, raw cacao, maple syrup, and vanilla extract. Whisk until smooth. -
Step 2
Add the puffed rice to the bowl with the chocolate mixture. -
Step 3
Gently stir and fold until the puffed rice is evenly coated with the chocolate mixture. -
Step 4
Spread the coated puffed rice in a single layer on a baking sheet lined with parchment paper. -
Step 5
Bake at 300°F (150°C) for 10-15 minutes, stirring halfway through, until lightly toasted and crispy. -
Step 6
Remove from oven and let cool completely on the baking sheet. The cereal will crisp up as it cools.
Important Information
Nutrition Facts (Per Serving)
It is important to consider this information as approximate and not to use it as definitive health advice.
Allergy Information
Please check ingredients for potential allergens and consult a health professional if in doubt.