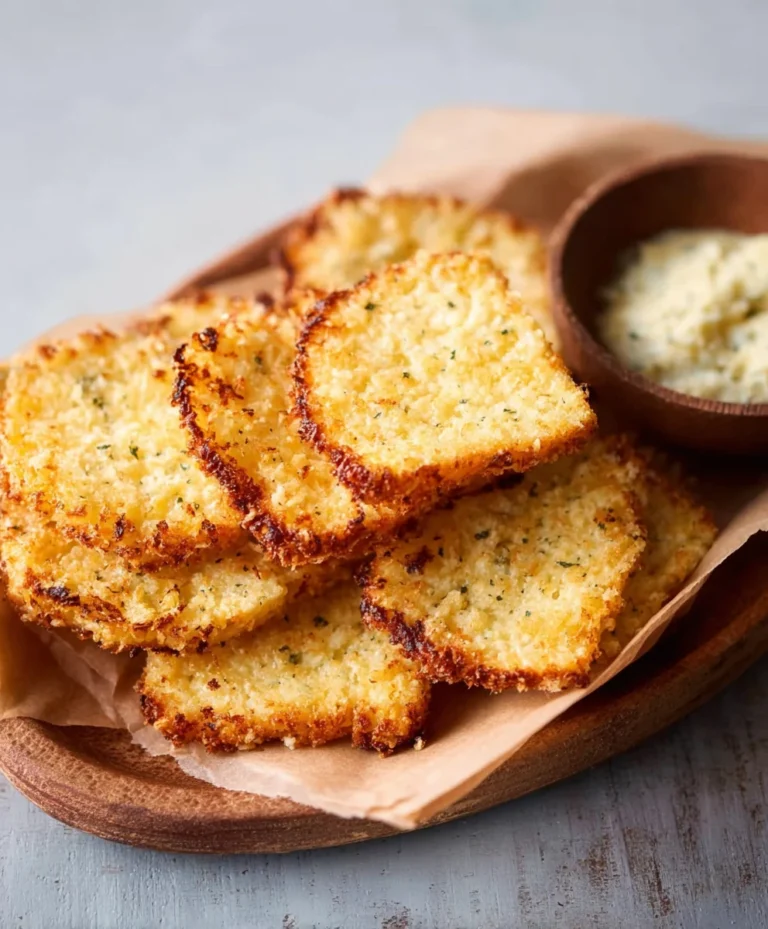
Homemade Cheddar Cheese Crackers- Cheez It Style
Homemade Cheez Its Recipe Cheddar Cheese Crackers are not just a snack; they’re a nostalgic trip back to childhood, a delightful crunchy companion to any afternoon, and frankly, an absolute game-changer for anyone who loves that iconic cheesy, salty flavor. Forget those flimsy boxed versions; when you bake your own Homemade Cheez Its Recipe Cheddar Cheese Crackers from scratch, you unlock a level of flavor and satisfaction that is simply unparalleled. What is it about these little squares that captivates us? It’s the perfect balance of sharp cheddar, a hint of salt, and that incredibly satisfying crisp texture that makes them so addictive. Plus, making them yourself means you control the quality of ingredients, ensuring a truly superior cheesy experience. This recipe elevates the simple snack into a culinary triumph, perfect for sharing, gifting, or just indulgin extractg in whenever that craving strikes.

Ingredients:
- 2 cups all-purpose flour
- 1 teaspoon baking powder
- 1/2 teaspoon salt
- 1/4 teaspoon garlic powder
- 1/4 teaspoon onion powder
- 1/4 teaspoon smoked paprika
- 1 cup (2 sticks) unsalted butter, cold and cut into cubes
- 1 1/2 cups finely shredded sharp cheddar cheese
- 1/4 cup ice water
- Optional: Pinch of cayenne pepper for a little kick
- Optional: Extra cheddar cheese for topping
Preparing the Dough
Step 1: Combine Dry Ingredients
First things first, let’s get our dry ingredients all mixed up. In a large mixing bowl, whisk together the all-purpose flour, baking powder, salt, garlic powder, onion powder, and smoked paprika. If you’re feeling a little adventurous and want a touch of heat, this is also the time to add in that pinch of cayenne pepper. Whisking them together ensures that the leavening agent (baking powder) and the seasonings are evenly distributed throughout the flour. This is crucial for consistent flavor and texture in your finished crackers.
Step 2: Cut in the Cold Butter
Now comes the part where we create that wonderfully flaky texture. Add the cold, cubed unsalted butter to the dry ingredients. You can do this in a couple of ways. My preferred method is to use a pastry blender or even two butter knives to cut the butter into the flour mixture. You want to work quickly so the butter stays cold. Continue until the mixture resembles coarse crum extractbs with some pea-sized pieces of butter still visible. These little pockets of butter will melt in the oven, creating steam that makes the crackers puff up and become delightfully crispy. Alternatively, you can pulse the butter and flour mixture in a food processor until it reaches the desired consistency, being careful not to over-process and turn it into a paste.
Step 3: Incorporate the Cheese
Next, it’s time for the star of the show – the cheese! Add the finely shredded sharp cheddar cheese to the butter and flour mixture. Gently toss everything together with a fork or your hands to distribute the cheese evenly. The cold butter and cheese are key here; we don’t want them to get warm and melty at this stage. The goal is for the cheese to be individual little flecks throughout the dough. If you’re using extra cheddar for topping, set that aside for later.
Forming and Baking the Crackers
Step 4: Add Ice Water and Form the Dough
This is where our dough starts to come together. Gradually add the ice water, one tablespoon at a time, mixing gently with a fork after each addition. You only need enough water to bring the dough together into a cohesive ball. It might seem like it’s not coming together at first, but keep adding the water sparingly until it just starts to clump. Be careful not to over-mix or add too much water, as this can result in tough crackers. Once the dough has formed a shaggy mass, turn it out onto a lightly floured surface. Gently bring it together into a disc, being careful not to knead it. The less you work the dough at this stage, the more tender your crackers will be. Wrap the disc tightly in plastic wrap and refrigerate for at least 30 minutes. This chilling time is essential for the gluten to relax and for the fat to firm up again, making it easier to roll out and ensuring a good texture.
Step 5: Rolling and Cutting the Crackers
Preheat your oven to 400°F (200°C) and line two baking sheets with parchment paper. This prevents sticking and makes for easy cleanup. Take your chilled dough out of the refrigerator. On a lightly floured surface, roll out the dough to about 1/8-inch thickness. You want them thin enough to get crispy but not so thin that they burn easily. If the dough becomes too soft to handle, pop it back into the refrigerator for a few minutes. Use a pizza cutter or a sharp knife to cut the dough into your desired cracker shapes. Classic squares are always a hit, but feel free to get creative with cookie cutters! For that authentic look and texture, use a fork to prick each cracker a few times. This allows steam to escape during baking, preventing them from puffing up too much and ensuring an even crisp. If you’re adding extra cheese on top, lightly brush each cracker with a tiny bit of water and sprinkle generously with the reserved shredded cheddar.
Step 6: Baking to Golden Perfection
Carefully transfer the cut crackers to the prepared baking sheets, leaving a little space between them. Bake for 10-15 minutes, or until the edges are golden brown and the crackers are firm to the touch. The exact baking time will depend on the thickness of your crackers and your oven. Keep an eye on them, especially towards the end, as they can go from perfectly baked to burnt very quickly. If you notice some crackers browning faster than others, you can rotate the baking sheets halfway through the baking time or remove the faster-baking ones early.
Step 7: Cooling and Enjoying
Once baked, remove the crackers from the oven and let them cool on the baking sheets for a few minutes before transferring them to a wire rack to cool completely. This cooling process is vital for achieving maximum crispness. As they cool, they will continue to harden. Once completely cooled, your homemade cheddar cheese crackers are ready to be devoured! Store any leftovers in an airtight container at room temperature for up to a week. They are perfect for snacking on their own or serving with your favorite dips.

Conclusion:
We’ve reached the end of our journey to creating the perfect Homemade Cheez Its Recipe Cheddar Cheese Crackers! You’ve learned how to whip up these delightfully cheesy, perfectly crisp crackers right in your own kitchen. The satisfaction of biting into a homemade cracker, knowing exactly what goes into it, is truly unparalleled. These crackers are fantastic on their own as a satisfying snack, but don’t stop there! They make a brilliant addition to cheese boards, a crunchy companion to soup, or even a fun addition to a kid’s lunchbox. Experiment with different cheeses for exciting variations – a sharp white cheddar can offer a different tang, or a smoky gouda might add an unexpected depth of flavor. Don’t be afraid to play with herbs and spices too; a pinch of paprika or garlic powder can elevate your Homemade Cheez Its Recipe Cheddar Cheese Crackers to a whole new level. So go ahead, preheat your oven, and get ready to experience the joy of homemade cheesy goodness. Happy baking!
Frequently Asked Questions:
Can I make these crackers gluten-free?
Absolutely! You can achieve a gluten-free version by substituting a good quality gluten-free all-purpose flour blend for the regular flour. Ensure your blend contains xanthan gum, or add about 1/2 teaspoon if it doesn’t, to help with binding.
How should I store my Homemade Cheez Its Recipe Cheddar Cheese Crackers?
Once completely cooled, store your Homemade Cheez Its Recipe Cheddar Cheese Crackers in an airtight container at room temperature. They should stay delightfully crisp for up to a week. For longer storage, you can freeze them, though they might lose a bit of their crispness upon thawing.
Homemade Cheddar Cheese Crackers – Cheez It Style
Whip up a batch of homemade cheddar cheese crackers with a texture and flavor reminiscent of your favorite store-bought snack.
Ingredients
-
2 cups all-purpose flour
-
1 teaspoon baking powder
-
1/2 teaspoon salt
-
1/4 teaspoon garlic powder
-
1/4 teaspoon onion powder
-
1/4 teaspoon smoked paprika
-
1 cup (2 sticks) unsalted butter, cold and cut into cubes
-
1 1/2 cups finely shredded sharp cheddar cheese
-
1/4 cup ice water
-
Pinch of cayenne pepper (optional)
-
Extra cheddar cheese for topping (optional)
Instructions
-
Step 1
In a large mixing bowl, whisk together the all-purpose flour, baking powder, salt, garlic powder, onion powder, and smoked paprika. If desired, add a pinch of cayenne pepper. Whisk to ensure even distribution. -
Step 2
Add the cold, cubed unsalted butter to the dry ingredients. Use a pastry blender, two butter knives, or a food processor to cut the butter into the flour mixture until it resembles coarse crumbs with pea-sized pieces of butter visible. Work quickly to keep the butter cold. -
Step 3
Add the finely shredded sharp cheddar cheese to the butter and flour mixture. Gently toss with a fork or hands to distribute the cheese evenly. Avoid warming the cheese and butter at this stage. -
Step 4
Gradually add ice water, one tablespoon at a time, mixing gently with a fork until the dough just comes together into a cohesive ball. Be careful not to over-mix or add too much water. Turn the dough out onto a lightly floured surface, gently form into a disc, wrap tightly in plastic wrap, and refrigerate for at least 30 minutes. -
Step 5
Preheat oven to 400°F (200°C) and line two baking sheets with parchment paper. Roll out the chilled dough on a lightly floured surface to about 1/8-inch thickness. Cut into desired shapes using a pizza cutter or sharp knife. Prick each cracker a few times with a fork. If adding extra cheese, lightly brush crackers with water and sprinkle with reserved cheddar. -
Step 6
Transfer crackers to the prepared baking sheets, leaving space between them. Bake for 10-15 minutes, or until edges are golden brown and crackers are firm. Watch closely to prevent burning. Rotate baking sheets halfway through if needed. -
Step 7
Remove crackers from the oven and let cool on baking sheets for a few minutes before transferring to a wire rack to cool completely. Store cooled crackers in an airtight container at room temperature.
Important Information
Nutrition Facts (Per Serving)
It is important to consider this information as approximate and not to use it as definitive health advice.
Allergy Information
Please check ingredients for potential allergens and consult a health professional if in doubt.