Sugar Free Fudge – Rich & Delicious Easy Recipe
Sugar Free Fudge is a confectionary dream come true, especially for those of us who adore that rich, decadent chocolatey goodness but are watching our sugar intake. For years, I thought indulgin extractg in creamy, melt-in-your-mouth fudge meant surrendering to a sugar rush. But oh, how wrong I was! This delightful treat is proof that you can absolutely satisfy your sweet cravings without the unwanted sugar. What is it about fudge that captures our hearts? It’s that perfect balance of velvety smooth texture and intense flavor, a miniature indulgence that feels like a luxurious escape. This particular sugar free fudge recipe elevates that experience by offering all the comfort and joy, minus the guilt. It’s a testament to how simple, quality ingredients can create something truly magical, making sugar free fudge a welcome addition to any gathering or quiet moment of self-care.
Why We Adore This Treat
The Ultimate Guilt-Free Indulgence
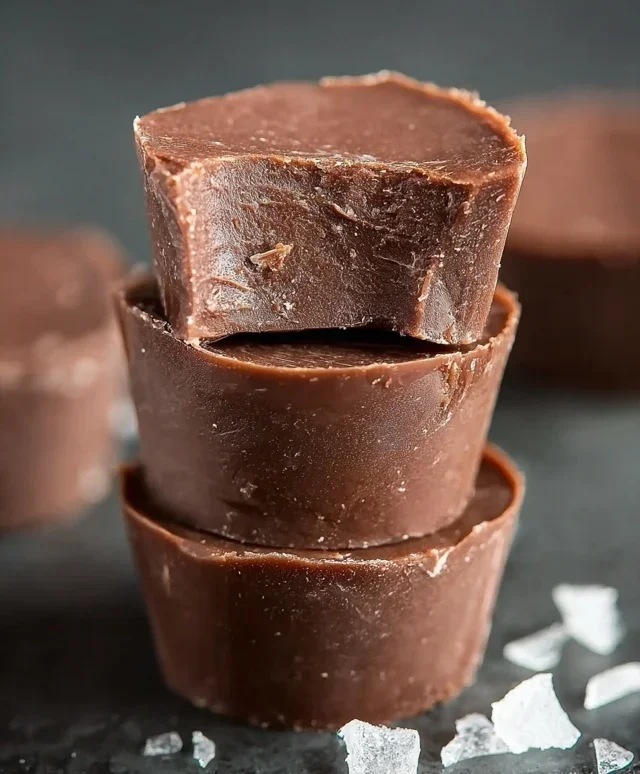
Sugar Free Fudge
Welcome to a guilt-free indulgence! For those of us who adore the rich, creamy goodness of fudge but are looking to cut down on sugar, I’ve got a treat for you. This sugar-free fudge recipe is incredibly simple to make and delivers all the decadent flavor you crave without any of the refined sugar. It’s perfect for a quick sweet fix, a thoughtful homemade gift, or even for satisfying those late-night cravings. The magic behind this recipe lies in the quality of the sugar-free chocolate chips and the creamy nut butter, which together create a surprisingly rich and satisfying texture.
What I love most about this recipe is its adaptability. While I’m providing a base recipe that I adore, feel free to experiment! If you have a favorite nut butter, swap it in. Want a hint of something extra? A pinch of sea salt can elevate the chocolate flavor beautifully, or a dash of cinnamon can add a warm, comforting note. This recipe is incredibly forgiving, making it ideal for bakers of all skill levels.
Ingredients:
Cooking Instructions:
Let’s get started on creating this delightful sugar-free fudge. The process is straightforward and requires minimal active cooking time, making it a weeknight-friendly recipe. Ensure you have a heatproof bowl that fits snugly over a saucepan, and a small baking dish (an 8×8 inch pan works perfectly) lined with parchment paper for easy removal of the fudge later.
Step 1: Prepare Your Workspace and Equipment
Before you begin extract melting the chocolate, it’s crucial to have everything ready. Line an 8×8 inch baking dish with parchment paper, leaving some overhang on the sides. This parchment paper is your best friend for lifting the fudge out of the pan cleanly once it’s set. You can also lightly grease the pan before lining it for extra insurance, though the parchment is usually sufficient. Have your mixing bowl, whisk or spatula, and all your ingredients measured out and within easy reach. This preparation ensures a smooth and efficient cooking process, preventing any hurried mistakes when dealing with melted chocolate.
Step 2: Gently Melt the Chocolate
The key to achieving a smooth and creamy fudge is to melt the sugar-free chocolate chips very gently. The best method for this is a double boiler. Fill a saucepan with about an inch or two of water and bring it to a gentle simmer over medium-low heat. Place a heatproof bowl on top of the saucepan, making sure the bottom of the bowl does not touch the water. Add the 2 cups of sugar-free chocolate chips to the bowl. Stir the chocolate constantly with a spatula or whisk as it begin extracts to melt. You want the chocolate to melt evenly and smoothly without scorching. If the water boils too vigorously, reduce the heat. If the chocolate starts to seize up or look grainy, it’s usually a sign of overheating or the presence of water, so be patient and keep stirring.
Step 3: Incorporate the Nut Butter
Once the sugar-free chocolate chips are almost completely melted, add the 1 cup of almond butter (or your chosen nut or seed butter) to the bowl. Continue to stir gently. The heat from the melted chocolate will help to soften and integrate the nut butter. Keep stirring until the mixture is completely smooth and homogenous, with no streaks of chocolate or nut butter visible. This is where the richness and fudgy texture begin extract to develop. If your nut butter is particularly stiff, you might need to stir a little more vigorously to ensure it’s fully combined. The goal is a glossy, unified mixture.
Step 4: Add the Vanilla Extract
Now it’s time to add the flavor enhancer: 1 teaspoon of vanilla extract. Stir it into the chocolate and nut butter mixture until it’s fully incorporated. The vanilla extract adds a wonderful depth of flavor and helps to round out the sweetness and richness of the fudge. While it might seem like a small amount, it makes a noticeable difference in the final taste. Give it a good mix to ensure the vanilla is distributed evenly throughout the entire batch.
Step 5: Pour and Set the Fudge
Once your fudge mixture is smooth and glossy, carefully pour it into your prepared baking dish. Use your spatula to spread the fudge evenly into the corners and across the entire surface. The mixture will be quite thick. Gently tap the pan on the counter a few times to help settle the fudge and remove any air bubbles. Then, place the dish in the refrigerator. Allow the fudge to set for at least 2-3 hours, or until it’s firm to the touch. For best results and a truly solid fudge, I often leave it in the fridge overnight.
Step 6: Cut and Enjoy!
Once the fudge has completely set, use the parchment paper overhang to lift the entire block of fudge out of the baking dish. Place it on a cutting board. For clean cuts, you can warm a sharp knife by running it under hot water and then drying it thoroughly before cutting. Slice the fudge into small, bite-sized squares. You can make them as big or as small as you like! Store your delicious sugar-free fudge in an airtight container in the refrigerator. It stays wonderfully firm and delicious for about a week.
Enjoy every decadent, sugar-free bite!
Conclusion:
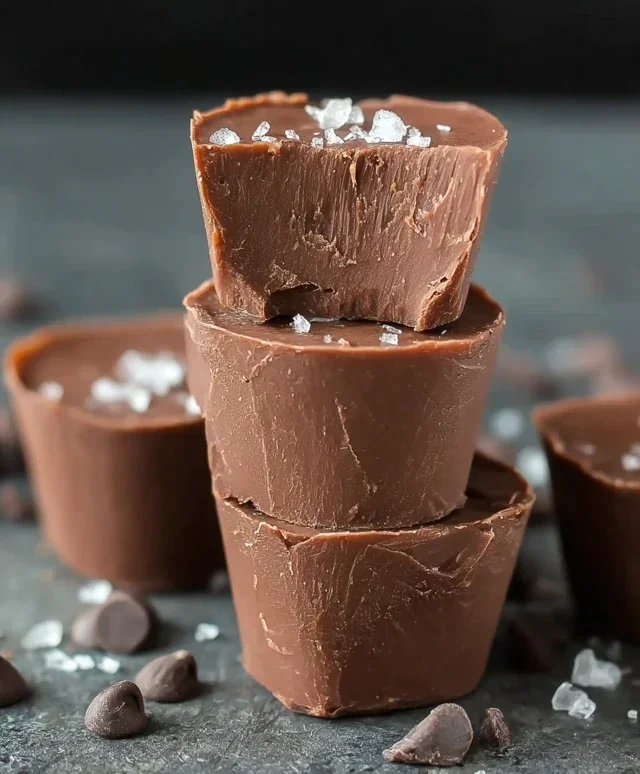
So there you have it – a truly delightful Sugar Free Fudge recipe that proves you don’t need refined sugar to achieve that classic rich, chocolatey, melt-in-your-mouth experience! This recipe is fantastic because it uses simple, readily available sugar substitutes and a handful of ingredients to create a guilt-free indulgence that’s perfect for satisfying those sweet cravings. It’s incredibly versatile, too. Serve small squares as a sophisticated dessert after dinner, pack some for a satisfying afternoon treat, or even use it as a component in other desserts, perhaps crum extractbled over a Sugar Free Cheesecake or as a topping for sugar-free brownies. Don’t be afraid to experiment with variations! You could add a pinch of sea salt for a salted caramel effect, a hint of espresso powder for a mocha twist, or even finely chopped nuts for added texture and flavor. I truly encourage you to give this Sugar Free Fudge a try. It’s a rewarding and delicious way to enjoy a beloved treat without the sugar!
Frequently Asked Questions:
What’s the best sugar substitute to use for this Sugar Free Fudge?
For this recipe, I’ve found that erythritol or a monk fruit-erythritol blend tends to work exceptionally well, mimicking the texture and sweetness of sugar without the unpleasant aftertaste some other sweeteners can leave. Xylitol is another option, but be mindful that it is toxic to dogs.
Can I make this fudge without dairy?
Absolutely! You can easily make this recipe dairy-free by using a good quality sugar-free dark chocolate alternative and a plant-based milk, such as unsweetened almond or coconut milk. Ensure your butter substitute is also dairy-free.
My fudge didn’t set up properly, what went wrong?
Often, this is due to not cooking the mixture to the correct temperature, or not letting it cool sufficiently before cutting. Ensuring your sugar substitutes are measured accurately and that you follow the cooling instructions carefully are key to achieving that perfect fudgy texture.
Sugar Free Fudge
A simple and delicious sugar-free fudge recipe using sugar-free chocolate chips and almond butter.
Ingredients
-
2 cups sugar free chocolate chips
-
1 cup almond butter
-
1 teaspoon vanilla extract
-
1/4 cup unsweetened cocoa powder
-
1/2 teaspoon salt
Instructions
-
Step 1
Line an 8×8 inch baking pan with parchment paper. -
Step 2
In a microwave-safe bowl, combine the sugar-free chocolate chips and almond butter. -
Step 3
Microwave in 30-second intervals, stirring between each, until smooth and fully melted. This should take about 1-2 minutes total. -
Step 4
Stir in the vanilla extract, unsweetened cocoa powder, and salt until well combined and the mixture is smooth. -
Step 5
Pour the mixture into the prepared baking pan and spread evenly. -
Step 6
Refrigerate for at least 2-3 hours, or until firm. -
Step 7
Once firm, lift the fudge out of the pan using the parchment paper and cut into squares.
Important Information
Nutrition Facts (Per Serving)
It is important to consider this information as approximate and not to use it as definitive health advice.
Allergy Information
Please check ingredients for potential allergens and consult a health professional if in doubt.